Why Is My Samosa Not Crispy? 7 Mistakes That Make Your Pastry Soft and Oily After Frying
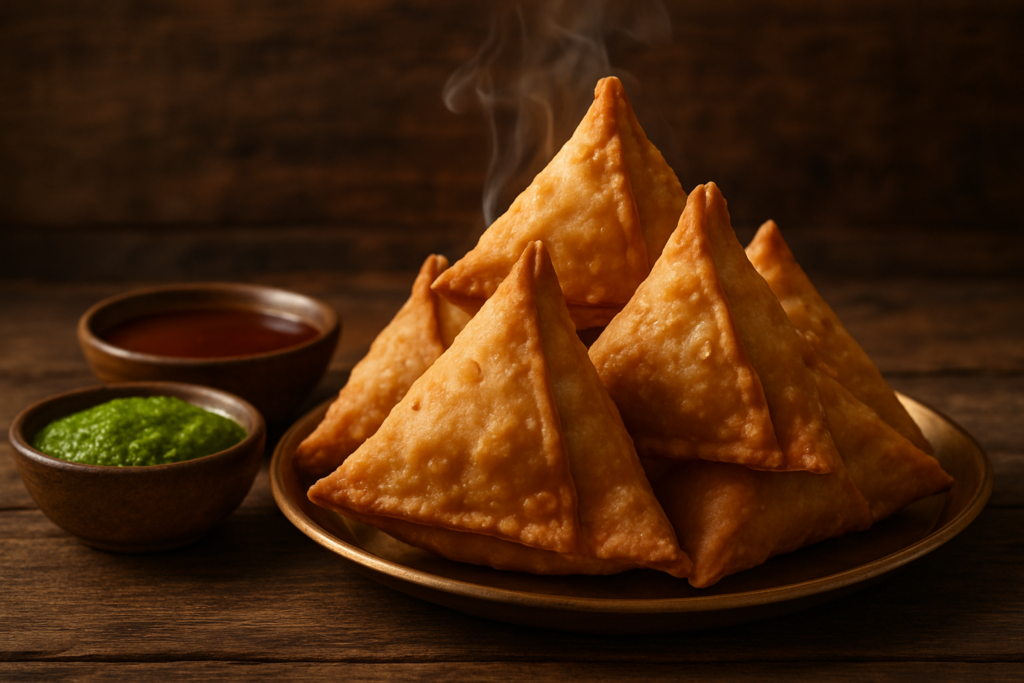
Why Your Samosa Pastry Goes Soft — and How to Fix It
A crispy samosa depends on at least five or six things going right simultaneously. Miss even one — too little fat in the dough, oil that’s too hot, paper towels instead of a rack — and you get soft, oily pastry. This post covers all seven of the most common mistakes, explains the science behind each one, and gives you a complete aloo-matar samosa recipe with the correct technique built in from the start.
Quick Recipe Overview
Prep Time: 40 minutes | Cook Time: 30 minutes | Total Time: 70 minutes | Servings: 12 samosas
This recipe walks you through both the classic aloo-matar samosa filling AND a detailed technique guide explaining exactly why samosa pastry goes soft after frying — and how to fix it. Perfect for beginners who want foolproof, crispy results from their very first batch.
Why You’ll Love This Recipe (and These Troubleshooting Tips)
- Finally get that crunch: These tips address the real science behind crispy samosa dough — not just generic advice you’ve already read.
- Works in any kitchen: No special equipment needed. No thermometer required (though I’ll tell you how to use one if you have it).
- Make-ahead friendly: Freeze unfried samosas and fry them later without losing crispiness.
- Beginner-proof: Every step includes a sensory cue so you know exactly what you’re looking for, even if you’ve never made samosas before.
- Honest troubleshooting: The focus is on what goes wrong and why — that’s where the real learning happens.
Ingredients You’ll Need for Crispy Samosa Dough
Before we get to the mistakes, here is the base recipe so everything makes sense in context.
For the Dough
- 2 cups (250g) maida / all-purpose flour — This is non-negotiable for the classic crispy crust. See the FAQ if you want to use atta.
- 1/4 cup ghee or neutral oil — This is your moyan, the fat that gets rubbed into the flour. Ghee gives a richer flavour; refined oil works perfectly too. If you’re outside India, use any neutral vegetable oil or even Crisco shortening in a pinch.
- 1/2 tsp ajwain (carom seeds) — Adds that distinctive samosa flavour and aids digestion. Substitute with a tiny pinch of dried thyme if you absolutely can’t find it, though the flavour will differ.
- 1/2 tsp salt
- Cold water, approximately 5-6 tbsp — Always use cold water. Room temperature water makes the dough softer.
For the Aloo-Matar Filling
- 4 medium boiled potatoes — boiled, slightly cooled, roughly mashed
- 1/2 cup boiled green peas — frozen peas work beautifully, just thaw them
- 2 tbsp oil, 1 tsp cumin seeds, 1-2 green chillies, 1 tsp grated ginger
- 1/2 tsp amchur, 1/2 tsp garam masala, 1/2 tsp coriander powder, salt to taste
- 2 tbsp fresh coriander leaves
- Oil for deep frying — enough to fully submerge the samosas. Refined sunflower oil works well. Abroad? Canola oil is excellent.
Why Is My Samosa Not Crispy? The 7 Real Mistakes
Each of these mistakes on its own can ruin a samosa. Together, they’re a disaster. Read all of them before you start cooking.
Mistake #1: Not Enough Moyan (Fat) in the Dough — The Biggest Culprit
This is the single most common answer to “why is my samosa not crispy” — and it’s the one most people overlook because the dough still looks and feels fine. Moyan is the term for the fat rubbed into the flour before any water is added. It coats the flour particles and creates thin, flaky layers when fried — similar to how shortcrust pastry works.
The classic ratio is 1 part fat to 4 parts flour by weight. Most people eyeball it and use far less. You need to be generous here. And the rubbing process matters: work the fat into the flour with the tips of your fingers (not your palms — your palms are too warm and will melt the fat) for a full 3-4 minutes until every grain of flour is coated. When you press a fistful of the mixture, it should hold its shape like damp sand.
The test: if you can press the flour into a ball before adding any water, the moyan is right. If it crumbles apart, add more fat.
Mistake #2: The Dough Is Too Soft
Samosa dough should be noticeably stiffer than chapati dough. Soft dough equals soft samosa pastry. The gluten structure in stiff dough is tighter, which means it creates a more defined flaky shell when fried rather than puffing up like bread.
Add water one tablespoon at a time, and stop early. The dough will feel almost tough when you press it — that’s exactly right. If it’s smooth and pliable like play-dough, add a little more flour. This is one of those things that feels counterintuitive until you see the results side by side.
Mistake #3: Rolling the Pastry Too Thick
Thick pastry doesn’t cook through properly during frying, leaving the inner layers doughy and chewy. Roll your samosa pastry to about 2mm thickness — you should be able to see a very slight shadow of your hand through it if you hold it up to light. It puffs up during frying and the finished crust is perfect.
Mistake #4: Wet or Warm Filling
If the filling has any moisture in it — from hot potatoes releasing steam, or watery peas — that moisture turns to steam inside the samosa during frying. Steam softens the pastry from the inside out. Always cool the filling completely before stuffing, and make sure there’s no excess liquid. Spreading the filling on a plate and leaving it for 20 minutes before using makes a significant difference.
Mistake #5: Frying at the Wrong Temperature (Usually Too High)
This is the counterintuitive one. Most people assume high heat = crispier food. With samosas, it’s the opposite. Oil that’s too hot sets the outer crust immediately but doesn’t allow the inner layers of dough to cook through. You end up with a golden-looking samosa that’s raw or gummy inside — and once it cools, the moisture from those undercooked layers migrates out and makes the whole thing soft and greasy.
The correct approach is to start frying on medium-low heat (around 150-160°C) for the first 8-10 minutes, then increase to medium to get the golden colour. Yes, it takes longer. Yes, it’s absolutely worth it. Serious Eats has a wonderful breakdown of the science of deep frying temperatures if you want to geek out on why this works the way it does.
Mistake #6: Overcrowding the Pan
When you add too many samosas at once, the oil temperature drops sharply. Cold oil soaks into food rather than crisping it — this is why food fried in overcrowded oil always comes out greasy and soft. Fry in small batches of 3-4 samosas (depending on your pan size) and let the oil come back up to temperature between batches. Give each samosa enough room to move around freely.
Mistake #7: Draining on Paper Towels
Paper towels absorb the oil from the bottom of the samosa, but they also trap steam. That steam has nowhere to go, so it condenses on the surface of the pastry and makes it soggy. Always drain samosas on a wire cooling rack, set over a tray to catch drips. Air circulates on all sides, and you get a uniformly crispy result.
Step-by-Step Instructions for Crispy Samosas at Home
- Make the dough moyan first: Combine maida, salt, and ajwain in a large bowl. Add ghee or oil and rub it thoroughly into the flour with your fingertips for 3-4 minutes until it looks like rough breadcrumbs and holds its shape when pressed. This is the foundation of perfect crispy samosa dough.
- Add cold water and knead to a stiff dough: Add cold water one tablespoon at a time, kneading between additions. Stop when the dough just comes together — it should be firm and tight, not smooth and soft. Knead for 5 minutes. Cover with a damp cloth and rest for 20-25 minutes.
- Make the filling: Heat 2 tbsp oil in a pan. Splutter cumin seeds, then add ginger and green chillies for 30 seconds. Add roughly mashed potatoes and peas (don’t over-mash — some texture is good). Add amchur, garam masala, coriander powder, and salt. Mix and cook for 2 minutes on medium heat. Take off the heat, add fresh coriander, spread on a plate, and cool completely.
- Portion and roll the dough: Divide rested dough into 6 balls (for large samosas). Keep covered while working. Roll one ball into an oval shape approximately 6-7 inches long and 4-5 inches wide, about 2mm thin. Cut in half to get two semicircles.
- Shape into cones: Take one semicircle and fold the straight edge, overlapping by 1cm, to form a cone. Press the seam firmly with a dab of water. Make sure there are no gaps or air pockets.
- Fill and seal: Spoon 1.5-2 tablespoons of cooled filling into the cone. Don’t overfill. Pinch the open top edge together firmly, using a tiny bit of water to help seal. Press with a fork if you like the decorative edge. Set aside and cover.
- Heat oil correctly: Pour enough oil into a kadai so samosas can fully submerge. Heat on medium-low. Test with a tiny piece of dough — it should rise slowly and steadily, not shoot up to the surface immediately.
- First fry — slow and steady: Gently slide in 3-4 samosas. Fry on medium-low for 8-10 minutes, turning occasionally. The samosas will look pale — that’s fine and correct. You’ll see small bubbles appearing on the surface, which is the sign of a properly formed flaky crust.
- Second fry — get the colour: Increase heat to medium and fry for another 3-5 minutes until deep golden brown all over. The bubbling will slow and the crust will look set and crispy.
- Drain correctly: Remove with a slotted spoon and place on a wire rack immediately. Never paper towels. Serve hot with fresh mint chutney and tamarind chutney.
Tips for Perfect Crispy Samosa Every Time
- Use cold water and cold fat: Warm water activates gluten differently and tends to make dough softer. Cold fat creates better flakiness. Chilling the flour for 10 minutes before mixing makes a real difference in hot weather.
- Let the oil come back to temperature between batches: After each batch, wait 2-3 minutes before adding the next set. Rushing this is a primary cause of greasy samosas.
- Don’t cover freshly fried samosas: Steam is the enemy. If you cover samosas to “keep them warm”, they turn soft almost immediately. For a party, keep them on a wire rack in a low oven (150°C) uncovered for up to 30 minutes.
- Seal every edge properly: Any small gap in the seal is an entry point for oil and an exit point for filling. Take the extra few seconds to press every edge firmly.
- Don’t over-mash the potatoes: Gluey, over-mashed potato filling is dense and holds more moisture. Rough mashing leaves texture and allows steam to escape more easily during frying.
Variations
Jain / No Onion No Garlic Samosa
The classic aloo-matar filling in this recipe is already completely Jain-friendly — it uses no onion or garlic at all. Just make sure your garam masala doesn’t contain any asafoetida-based pre-mixes that might include garlic powder. A pinch of hing (asafoetida) added to the tempering is traditional and Jain-acceptable in most households.
Vegan Samosa
Use oil instead of ghee in the dough — the recipe is already written this way as an option. All other ingredients are plant-based. Vegan samosas are just as crispy when the technique is right.
Gluten-Free Samosa
Gluten-free samosas are genuinely difficult. The gluten structure in maida is part of what creates the flaky, crispy shell. The best GF substitute is a 1:1 GF all-purpose flour blend (the kind with xanthan gum already added). The result isn’t quite as flaky but is decent. Rice flour-based pastry is another option — it produces a thinner, crispier but more delicate shell, closer to a Thai-style spring roll wrapper, but works well.
Baked Samosa (Lower Oil)
Brush shaped samosas with oil and bake at 200°C for 25-30 minutes, turning halfway. I know purists will disagree, but they’re genuinely good — just not as dramatic in terms of crunch as properly fried ones. An air fryer at 180°C for 18-20 minutes also works very well as a weekday shortcut.
What to Serve With Crispy Samosas
- Hari Chutney (Mint-Coriander): The classic, cooling counterpoint to the hot, spiced filling.
- Tamarind-Date Chutney (Imli Chutney): Sweet, tangy, and deep — drizzle it generously.
- Samosa Chaat: Crush two samosas into a bowl, top with thin sev, mint chutney, imli chutney, chopped onion, and a dollop of whisked yogurt. Sprinkle chaat masala. This is how leftovers become a whole new meal.
Storage and Reheating
Unfried (Raw) Samosas
Place shaped, unfried samosas on a tray lined with baking paper so they don’t touch. Freeze for 2 hours, then transfer to a zip-lock bag. They keep for up to 2 months. Fry directly from frozen — no thawing needed. Add 4-5 extra minutes to the frying time and start on low heat.
Fried Samosas
Once fried, samosas are best eaten within 2-3 hours. They will soften as they cool, which is unavoidable — but you can significantly slow it down by storing them on a wire rack at room temperature (not in a closed container) for up to 4 hours. Refrigerate only if keeping overnight; they’ll keep for up to 2 days in an airtight container.
Reheating Without Losing Crunch
Do not microwave. Reheat in an air fryer at 180°C for 5-6 minutes, or on a wire rack in an oven at 190°C for 8-10 minutes. A dry pan on medium heat, turning occasionally, also works in a pinch. All three methods recover roughly 80% of the original crispiness.
Frequently Asked Questions
Why is my samosa not crispy even after frying on the right temperature?
The most overlooked reason is the dough itself — specifically, not enough moyan (fat) rubbed into the flour, or the dough being too soft. Even if your oil temperature is perfect, soft dough will always give you a bready, soft crust. Check the dough: it should feel firm, almost tough, before resting. If you can poke it and it springs back quickly, it’s too soft.
Why does my samosa become soft and oily after cooling down?
This usually means the oil was too hot during frying. High heat sets the outside crust quickly but doesn’t cook the interior pastry through, so once the samosa cools, moisture from inside migrates outward and softens the shell. Always start frying on medium-low heat, and drain on a wire rack — never paper towels. The wire rack prevents bottom-side sogginess from trapped steam.
Can I make samosa dough in advance?
Yes! Make the dough and filling a day ahead and refrigerate them separately. Wrap the dough tightly in cling film so it doesn’t dry out. Bring it to room temperature for 10 minutes before rolling. Shape and fry just before serving for the best results. You can also freeze unfried shaped samosas for up to 2 months and fry them directly from frozen.
How do I reheat samosas and keep them crispy?
Skip the microwave entirely — it creates steam and makes samosas rubbery within seconds. The best method is an air fryer at 180°C for 5-6 minutes, or a regular oven at 190°C for 8-10 minutes on a wire rack. You can also pan-fry them briefly in a dry pan on medium heat, turning until heated through and re-crisped. All three methods work well; the air fryer gives the most consistent results.
Does the type of flour really matter for crispy samosas?
Absolutely yes. Traditional samosa pastry uses maida (refined all-purpose flour) because its gluten structure creates the flaky, layered crust that crisps up beautifully during frying. Whole wheat atta will give you a denser, less crispy and slightly tougher result. If you want a healthier option, a 75:25 blend of maida and atta is the most advisable — beyond that, there is a real and noticeable difference in crispiness. The gap is significant.