Dal Tadka Recipe: Best Dhaba-Style Smoky Dal at Home (With the Dhungar Secret)
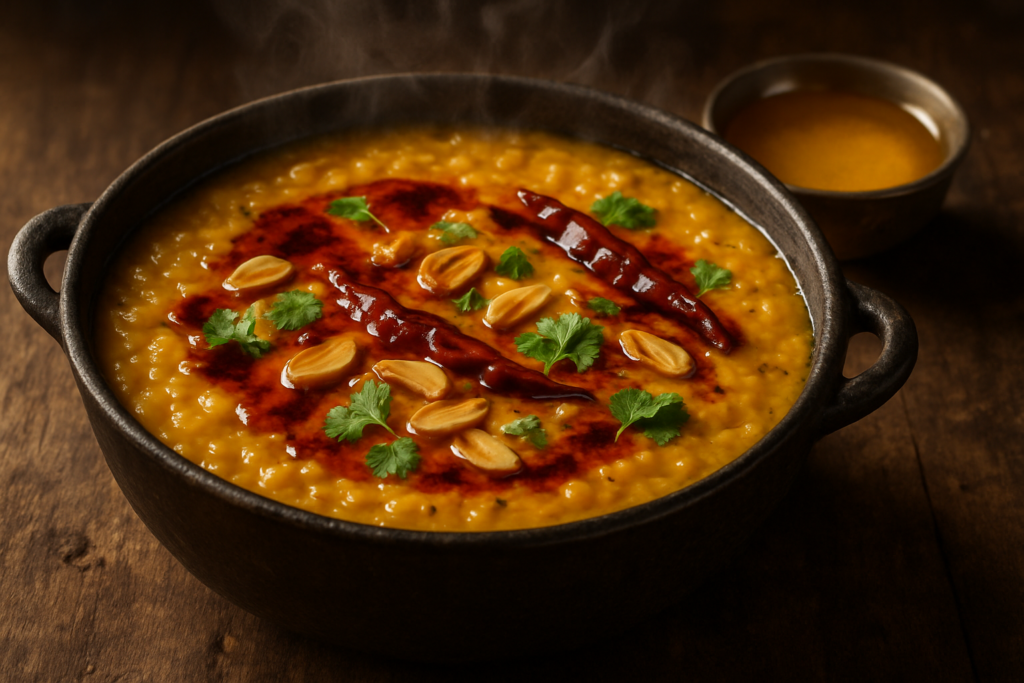
The Dal Tadka Recipe That Finally Tasted Like the Highway Dhaba
There’s a particular dhaba on the old Pune-Mumbai highway — the kind with plastic chairs, a ceiling fan that wobbles like it’s auditioning for a disaster film, and a cook who hasn’t changed his recipe since 1987. My husband and I used to stop there every single time we drove that route, just for the dal tadka. It arrived in a battered steel katori, swimming in ghee, with a smoky, almost charred aroma that hit you before the bowl even touched the table. We’d mop it up with tandoori roti and order a second serving before finishing the first.
I spent years trying to recreate that dal tadka recipe at home. Mine always tasted fine — pleasant, even — but it lacked that something. That haunting smokiness. One afternoon, my mother-in-law watched me cook and said, almost offhandedly, “You forgot the koyla.” The charcoal. I didn’t even know that was a thing you could do in a home kitchen. That was the day I learned about the dhungar method, and everything changed.
This dhaba-style dal tadka recipe is the result of probably fifty attempts, three arguments with my mother-in-law about which dal to use (she insists on pure toor; I sneak in some chana dal — I know, I know), and one minor incident involving too much charcoal smoke and a very unhappy smoke alarm. But the result? It tastes exactly like that highway dhaba. Every single time.
Prep Time: 15 minutes (plus 30 min soaking)
Cook Time: 30 minutes
Total Time: 45 minutes (active)
Servings: 4
This dal tadka recipe uses a double-tadka technique plus the dhungar charcoal smoking method to deliver that unmistakable smoky dhaba flavour at home. It’s rich, deeply spiced, and genuinely easy once you get the hang of it — even beginners can nail this on the first try.
Why You’ll Love This Dal Tadka Recipe
- That real smoky flavour: The dhungar method gives you authentic restaurant-style smokiness without a tandoor or fancy equipment — just a piece of charcoal.
- Double tadka magic: Most home recipes do one tadka. Dhaba cooks do two. This recipe shows you exactly when and why — it makes an enormous difference.
- Flexible and forgiving: Use a pressure cooker, an Instant Pot, or a regular pot — I’ve given instructions for all three.
- Pure comfort food: This is the kind of dal that makes you want to eat with your hands, straight from the bowl, with no apologies.
- Great for meal prep: Dal tadka tastes even better the next day. Make a big batch and thank yourself on a lazy Tuesday.
Ingredients You’ll Need for This Dal Tadka Recipe
For the Dal
- 3/4 cup toor dal (split pigeon peas) — the non-negotiable base. Wash it well; toor dal can be oily.
- 1/4 cup chana dal (split chickpeas) — my secret addition for body and slight sweetness. Purists use all toor; I use this blend. You do you.
- 1 medium tomato, finely chopped
- 1 medium onion, finely chopped
- 1 tsp ginger-garlic paste
- 1/2 tsp turmeric powder
- Salt to taste
- 3.5 cups water (for pressure cooking)
For the First Tadka (Cooked Into the Dal)
- 2 tbsp ghee — please use ghee here, not oil. This is where much of the flavour lives. Abroad substitution: Any good clarified butter works fine.
- 1 tsp cumin seeds
- 2 dried red chillies
- 1/4 tsp asafoetida (hing) — Abroad substitution: If you can’t find hing, skip it rather than substitute — nothing really replaces it, though a tiny pinch of garlic powder comes close.
- 1 tsp coriander powder
- 1/2 tsp red chilli powder
- 1/2 tsp garam masala
For the Second Tadka (Poured On Top)
- 2 tbsp ghee
- 1 tsp cumin seeds
- 3-4 garlic cloves, thinly sliced
- 2 dried red chillies
- 1/2 tsp Kashmiri red chilli powder — for colour, not fire. Abroad substitution: A mix of mild paprika and a tiny pinch of cayenne does the job.
- Fresh coriander leaves, chopped, for garnish
For the Dhungar Smoking (Optional But Please Do It)
- 1 small piece of natural hardwood charcoal (about the size of a large walnut) — Abroad: Look in Indian grocery stores, Middle Eastern grocery stores, or order online. It’s sometimes sold as ‘coconut charcoal’ too.
- 1/2 tsp ghee
- A small piece of foil or a tiny steel katori
How to Make Dal Tadka — Step-by-Step
Step 1: Soak and Prep Your Dals
- Combine the toor dal and chana dal in a bowl. Rinse them together under cold water three or four times until the water runs mostly clear. Then cover with fresh water and soak for at least 30 minutes. This isn’t strictly mandatory for toor dal alone, but since we’re using chana dal too, soaking ensures both cook evenly. Drain before cooking.
Step 2: Pressure Cook the Dal
- In a pressure cooker, combine the drained dals, chopped tomato, turmeric, salt, and 3.5 cups water. Close the lid and cook on medium-high heat for 4-5 whistles (about 12-15 minutes). If you’re using an Instant Pot, pressure cook on HIGH for 10 minutes with a 10-minute natural release. If cooking in a regular pot, it’ll take about 35-40 minutes of simmering with the lid on — keep checking and adding water as needed. The dal should be completely soft and mushy when done. Once pressure releases naturally, open and give it a good whisk. You want a smooth, slightly thick consistency — not watery, not paste-like. Add a splash of hot water if it’s too thick.
Step 3: Make the First Tadka and Build the Dal
- In a wide pan or kadai, heat 2 tablespoons of ghee over medium heat. Once the ghee is hot and shimmering — you’ll see it start to ripple — add the cumin seeds. Let them sizzle for about 20-30 seconds until they turn a shade darker and smell nutty. Now add the dried red chillies and asafoetida. Stir once. Add the finely chopped onion and cook, stirring frequently, for 8-10 minutes until they turn a deep golden brown. Don’t rush this — properly caramelised onion is the backbone of a good dhaba-style dal tadka. Add the ginger-garlic paste and cook for another 2 minutes until the raw smell disappears completely. You’ll know it’s done when the paste darkens slightly and the ghee begins to separate at the edges.
- Add the coriander powder, red chilli powder, and garam masala. Stir quickly and cook for 30 seconds on medium heat — this blooms the spices. If anything sticks, add a tiny splash of water.
- Pour the cooked, whisked dal into this masala. Stir everything together well. Taste and adjust salt. Let the whole thing simmer together on low heat for 8-10 minutes, stirring occasionally. This simmering time is what makes the dal absorb all those masala flavours rather than just sitting alongside them. The consistency should be like a pourable, thick soup — it will thicken more as it sits.
Step 4: The Dhungar Method — Smoking Your Dal Tadka at Home
- This is the step that transforms a good dal into a great one. First, open a window or turn on your kitchen exhaust — this produces a little smoke. Place a small piece of foil or a tiny steel katori directly in the centre of the dal, resting on top of the surface. Using tongs, hold your piece of charcoal directly over a gas flame (or in a cast iron pan over high heat) until it glows red-orange — this takes 2-3 minutes. You’ll see it start to ash over on the outside. Carefully place the glowing charcoal onto the foil/katori. Immediately drizzle 1/2 teaspoon of ghee over the hot charcoal — it will smoke dramatically and beautifully. Quickly cover the pan with a tight lid and leave it for exactly 2-3 minutes. No more. Remove the lid, take out the charcoal piece carefully, and discard it. Your dal will now have that haunting, woody smokiness.
Step 5: The Second Tadka (The Grand Finale)
- In a small tempering pan or the smallest frying pan you own, heat 2 tablespoons of ghee over medium-high heat. Once very hot, add the sliced garlic. Let it sizzle and turn golden — watch it carefully, this happens fast, about 45-60 seconds. Add the dried red chillies and let them puff up for 10 seconds. Take the pan off the heat, add the Kashmiri red chilli powder, stir once, and immediately pour this entire sizzling tadka directly over the dal. You want that dramatic sizzle when it hits. Do not stir it in — leave those gorgeous pools of red ghee on top for serving. Scatter fresh coriander over everything.
Tips for Perfect Dal Tadka Every Time
- Don’t skimp on onion-cooking time: I cannot stress this enough. Pale, undercooked onions make a pale, flavourless dal. A full 8-10 minutes of patient stirring is what gives dhaba dal that depth.
- Two tadkas are non-negotiable for dhaba style: The first builds the base; the second is poured fresh right before serving. That second hit of hot ghee with garlic and chilli is what you’re actually tasting at the restaurant.
- Charcoal quality matters: Use natural hardwood charcoal, not briquettes (which have chemicals). Natural charcoal is just carbonised wood and produces clean, food-safe smoke.
- The dhungar timing is precise: Two to three minutes is enough. More than that makes the dal taste bitter rather than smoky. Set a timer.
- Consistency check: Dal thickens as it cools. If serving later, keep it slightly thinner than you think you want — it’ll be perfect by the time it reaches the table.
Variations of This Dal Tadka Recipe
Jain / No Onion No Garlic Dal Tadka
Skip the onion and garlic entirely. Replace them with an extra pinch of asafoetida in the first tadka and a teaspoon of fennel seeds. It’s a completely different flavour profile — lighter and more aromatic — but still genuinely delicious. My Jain neighbour makes it this way and it’s wonderful.
Vegan Dal Tadka
Replace all the ghee with a good-quality refined coconut oil or a neutral vegetable oil like sunflower oil. The dal will still be very tasty — you’ll lose some of that rich, buttery quality, but the spices and dhungar smokiness more than compensate. Toor dal is naturally high in plant protein, making this an excellent vegan protein source.
Gluten-Free
This dal tadka recipe is naturally gluten-free as written — just make sure your asafoetida (hing) is a gluten-free variety. Many commercial hing powders contain wheat flour as a filler. Look for “compounded asafoetida” or “pure hing” on the label, or buy it from a trusted source.
Smoky Dal Without Charcoal
If you truly can’t source charcoal, you can get a partial smoky effect by dry-roasting 2-3 dried red chillies directly over the flame until slightly charred, then crushing and adding them to the tadka. It’s not the same — I won’t pretend it is — but it adds a whisper of that character.
What to Serve With This Dal Tadka Recipe
- Tandoori roti or butter naan: The classic pairing. Tear, dip, repeat. Check out my easy tandoori roti recipe for the full dhaba experience at home.
- Steamed basmati rice with a drizzle of ghee: The ghee on the rice melts into the dal and it becomes something almost transcendent. Simple is sometimes best.
- With jeera rice: My personal favourite pairing — the cumin in the rice echoes the cumin in the tadka beautifully. Try my restaurant-style jeera rice recipe alongside this.
A simple kachumber salad — diced onion, tomato, cucumber, lemon juice, and chaat masala — on the side cuts through all that richness perfectly.
Storage and Reheating
Refrigerator: Store leftover dal tadka in an airtight container in the fridge for up to 3 days. It will thicken considerably as it cools — this is normal.
Freezer: Dal freezes beautifully for up to 2 months. Portion it into freezer-safe containers. Thaw overnight in the fridge.
Reheating: Add a splash of water (or hot water) to loosen the dal and reheat it gently in a pan on low heat, stirring. Alternatively, microwave in 1-minute bursts, stirring between each. The best move? When reheating, do a fresh mini-tadka — just 1 teaspoon of ghee, a few cumin seeds, and a pinch of chilli powder — and pour it over. It makes the leftover dal taste almost freshly made. I do this every single time and it never fails.
Note on the dhungar: The smoky flavour does fade slightly overnight, which is the only real downside of this method. The dal is still delicious the next day, just a touch less dramatic in the smoke department.
Frequently Asked Questions About Dal Tadka
Can I make this dal tadka recipe without a pressure cooker?
Absolutely yes. Soak the dals for a full hour (instead of 30 minutes), then cook in a heavy-bottomed pot with a lid on low-medium heat for 35-45 minutes, checking every 10 minutes and adding hot water as needed. The dal is ready when it’s completely soft and you can mash a spoonful easily between your fingers. It takes longer, but the result is the same.
What is the dhungar method and is it safe to do indoors?
The dhungar method is a traditional Indian smoking technique where a piece of hot charcoal is placed in or near food, and ghee is drizzled over it to create aromatic smoke that infuses the dish. It’s perfectly safe indoors as long as you use natural hardwood charcoal (not chemical briquettes), keep your kitchen exhaust fan running, and limit the smoking time to 2-3 minutes. The amount of smoke produced is actually quite small — less than you’d expect. Think of it as controlled, intentional smoke rather than something your smoke alarm will panic about. Mine did once, but that was the time I left the lid off by mistake.
Which dal is best for dal tadka — toor, masoor, or a mix?
Traditional dhaba-style dal tadka uses toor dal (split pigeon peas) as the primary dal, sometimes with a small addition of chana dal for body. Masoor dal (red lentils) cooks faster and makes a lovely, smoother dal, but it’s technically a different dish. I use a 3:1 ratio of toor to chana dal in this recipe, which gives the best texture in my experience — creamy from the toor but with some substance from the chana. That said, if all you have is toor, use all toor. It’s still wonderful.
Why does my dal tadka not taste like the restaurant version?
Three reasons, almost always: not enough ghee (restaurants are generous, sometimes alarming so), undercooked onions in the masala base, and only one tadka instead of two. The dhungar method also makes a significant difference. If you follow this dal tadka recipe exactly — both tadkas, the full onion-cooking time, and the charcoal step — I genuinely believe you’ll be shocked at how close it tastes to your favourite dhaba’s version.
Can I use mustard oil instead of ghee for the tadka?
Yes! In many parts of northern India and Bengal, mustard oil is used for the tadka, which gives the dal a wonderfully pungent, sharp quality that’s quite different from the ghee version but equally authentic in its own regional way. If you go the mustard oil route, heat it to smoking point first to remove the sharpness, then let it cool slightly before adding your spices. I’d still use at least a teaspoon of ghee at the end just for richness, but that’s just me.