
Why Is My Paneer Rubbery? 6 Mistakes That Make Paneer Hard (And How to Fix Them)
Why Is My Paneer Rubbery? 6 Mistakes That Make Paneer Hard
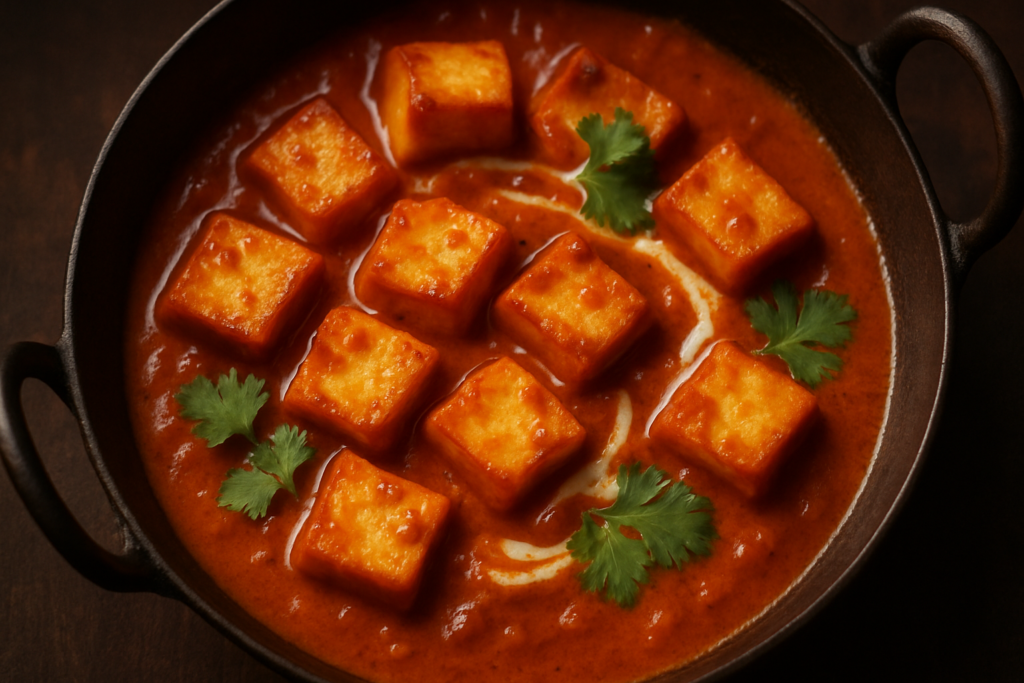
Paneer turns rubbery mainly because of overcooking, high heat, or skipping the soaking step. These six mistakes account for almost every case of tough, chewy paneer — whether you’re making palak paneer, kadai paneer, or paneer butter masala. Fix them and the texture transforms completely: soft, pillowy, and absorbent rather than dense and bouncy.
Prep Time: 10 minutes | Cook Time: 20 minutes | Total Time: 30 minutes | Servings: 4
Paneer turns rubbery and hard mainly because of overcooking, high heat, or skipping the soaking step. This guide covers all 6 root causes and their simple fixes — including the warm-water soak trick that makes a noticeable difference. Follow these tips and your paneer will be soft, pillowy, and melt-in-the-mouth every time.
Why You’ll Want to Read Every Single Word of This
- It fixes a problem most recipes never explain. Every paneer recipe tells you what to do, but almost none explain why the paneer goes wrong.
- Works for store-bought AND homemade paneer. The fixes here apply to both, with specific tips for each.
- No fancy equipment needed. You just need a bowl of warm water and some patience.
- Saves you from wasting expensive paneer. Good paneer isn’t cheap, especially outside India — these tips mean zero wasted batches.
- Your curries and dry dishes will taste completely different. Soft, tender paneer absorbs gravy beautifully. Rubbery paneer just sits there like a guest who won’t leave.
A Little Food Science: Why Paneer Becomes Hard When Cooking
Paneer is a fresh acid-set cheese made by curdling hot milk with an acid like lemon juice or vinegar, then pressing the curds to remove whey. The main protein in paneer is casein, and here’s the thing about casein — it doesn’t like high heat. When you expose paneer to temperatures above a certain point (or for too long), the protein strands cross-link and contract, squeezing out moisture and leaving you with a dense, chewy, rubbery cube.
Unlike meat proteins that can tenderize with long slow cooking, paneer protein only gets tougher the longer you apply heat. This is why the fixes are all about reducing heat and cooking time, not increasing them. Keep this in mind and the six mistakes below will make complete sense.
Ingredients You’ll Need (For Correctly Cooked Soft Paneer)
This isn’t a single curry recipe — it’s a method guide. But here’s what you’ll need to practice these fixes:
- 250g fresh paneer — homemade is ideal. If using store-bought, look for refrigerated blocks, not the vacuum-sealed shelf-stable kind, which is much denser. Outside India? Nanak, Verka, or Amul brands are solid. In a pinch, firm tofu can replace paneer (though the flavor and texture are different — it won’t absorb spices the same way).
- 2 cups warm water — for soaking. Not boiling, not cold. Warm enough that you can comfortably keep your hand in it.
- 1 teaspoon salt — optional but helpful in the soaking water. It seasons the paneer gently from the outside.
- 2 tablespoons oil or ghee — for pan-frying if your recipe calls for it. Ghee adds a beautiful flavor, but neutral oil works fine.
- Your curry or gravy of choice — these tips work with literally any paneer dish: palak paneer, kadai paneer, paneer butter masala, shahi paneer, paneer bhurji — all of them.
The 6 Reasons Why Your Paneer Is Rubbery (And How to Fix Each One)
Mistake 1: Using Paneer Straight from the Refrigerator
This is mistake number one and probably the most overlooked. When paneer is cold, the proteins are already tense and compact. The moment cold paneer hits a hot pan or hot gravy, the outside cooks way too fast while the inside is still cold — and you end up with an uneven texture that’s tough on the outside and weirdly grainy inside.
The Fix: Take your paneer out of the fridge at least 20-30 minutes before you plan to cook it. Let it sit on the counter and come to room temperature. This one habit alone will make a noticeable difference.
Mistake 2: Skipping the Warm Water Soak (Especially for Store-Bought Paneer)
Store-bought paneer is pressed harder and longer than homemade, which means it starts out denser. If you just cut it up and throw it directly into a hot pan, it’s fighting an uphill battle from the beginning.
The Fix: Soak your paneer cubes in warm salted water for 15-20 minutes before cooking. The warm water gently relaxes the protein structure, the cubes absorb a little moisture, and they come out noticeably softer and more porous — which also means they absorb gravy better. Don’t use boiling water or the outside will start to cook unevenly.
Mistake 3: Frying Paneer on High Heat for Too Long
A lot of recipes call for pan-frying or shallow-frying paneer to get that gorgeous golden crust. There’s nothing wrong with that — fried paneer is delicious and holds its shape beautifully in a curry. The problem is when the heat is cranked up to high and left going for 4-5 minutes per side in the name of getting a good color.
The Fix: Fry on medium heat, not high. You want a gentle sizzle, not an aggressive splutter. 1-2 minutes per side is genuinely all you need for a light golden color. The moment both sides are done, get the paneer off the heat immediately — and then drop those fried cubes straight into a bowl of warm water. This stops the cooking instantly and keeps them from drying out while you finish the rest of the dish.
Mistake 4: Boiling Paneer in the Gravy
Adding paneer to a curry and letting it bubble away in boiling gravy for 10-15 minutes “so it absorbs the flavors” is the fastest way to destroy paneer texture. The logic is understandable, but the heat exposure is simply too much.
The Fix: Add paneer to your curry in the last 2-3 minutes of cooking, on low heat. Or better yet, turn the flame off completely, add the paneer, stir gently, put the lid on, and let the residual heat do the work for 3-4 minutes. The paneer will warm through, absorb the gravy flavors, and stay perfectly soft. Paneer is already a cooked product — it just needs to be warmed, not cooked again from scratch.
Mistake 5: Not Adding Paneer to Warm Water After Frying
After frying, paneer continues to cook from residual heat, and it also loses moisture rapidly to the air. If it sits on a plate for even 5-10 minutes while you finish making the gravy, it can go from perfectly golden to disappointingly tough.
The Fix: Keep a bowl of warm water next to your stove. The second the paneer comes out of the pan, it goes into the water. Leave it there until your gravy is ready. Then drain and add. This is a technique used in professional restaurant kitchens across India, and it’s the reason restaurant paneer dishes almost always have softer paneer than what’s produced at home.
Mistake 6: Overcooking When Reheating Leftovers
A paneer curry that was perfect the night before can turn tough and chewy the next day if reheated on high heat or in a microwave on full power for two minutes. Reheating is where so much paneer goes wrong.
The Fix: Reheat paneer dishes on low heat, covered, adding a splash of water if needed to loosen the gravy. Stir gently. As soon as it’s hot through, stop. In the microwave, use 50% power in short 30-second bursts, stirring between each burst. Never let a paneer curry come to a rolling boil when reheating.
Tips for Perfect Soft Paneer Every Time
- Homemade paneer is always softer. If you have 30 minutes, making paneer at home from full-fat milk gives you the freshest, most tender result.
- Use full-fat milk for homemade paneer. Low-fat milk produces drier, tougher paneer. Don’t compromise here.
- Don’t press homemade paneer too hard or too long. 20-30 minutes of gentle pressing under a medium weight is enough for most recipes. Pressing for hours gives you a dense block that’s harder to keep soft when cooking.
- Cut paneer just before cooking. Pre-cut cubes dry out faster. Keep the block whole until you’re ready to use it.
- Always taste your paneer before adding spices. Fresh, good-quality paneer should taste milky and slightly tangy — almost like fresh mozzarella. If it tastes sour or has an off smell, no cooking technique will save it.
Variations: These Tips Work for Every Paneer Dish
For Jain / No-Onion-No-Garlic Recipes
All the tips above apply exactly the same way to Jain-style paneer dishes. The soaking, the frying temperature, the late addition to gravy — none of it has anything to do with onion or garlic. Your Jain Paneer Tikka Masala or No-Onion Paneer Makhani will benefit equally from everything shared here.
For Vegan Cooks Using Tofu
If you’re using firm tofu as a paneer substitute, press the tofu well before using (wrap in a towel, place a heavy pan on top for 15 minutes). The warm water soak trick doesn’t work as well for tofu — instead, marinate it in spiced yogurt or cashew cream for 20 minutes before pan-frying. Don’t fry on high heat either; medium heat for 2-3 minutes per side.
For Gluten-Free Diets
Paneer is naturally gluten-free, so all these tips apply as-is. Just double-check your store-bought spice mixes and curry pastes for hidden gluten if that’s a concern for you.
What to Serve With Perfectly Soft Paneer
Here are some pairings that work well with any soft, well-cooked paneer dish:
- Tandoori Roti or Butter Naan — The classic pairing. Soft paneer in a rich gravy with charred bread is one of life’s great pleasures.
- Jeera Rice — Simple cumin-flavored basmati rice. It lets the paneer dish shine without competing.
- Kachumber Salad — A crunchy cucumber, tomato, and onion salad with lemon and chaat masala. The acidity cuts through rich paneer gravies beautifully.
Storage and Reheating
If you have leftover paneer curry or dry paneer dishes, here’s how to store them without making the paneer tougher:
- Refrigerator: Store in an airtight container for up to 2-3 days. Make sure there’s enough gravy surrounding the paneer cubes to keep them moist. Paneer cubes sitting exposed in the fridge dry out fast.
- Freezer: Cooked paneer dishes don’t freeze well — the texture suffers. If freezing is necessary, the gravy freezes fine; add fresh paneer when reheating.
- Reheating: Low heat, covered pan, splash of water. Microwave at 50% power in bursts. Never boil.
Frequently Asked Questions About Rubbery Paneer
Why is my paneer rubbery even when I use fresh homemade paneer?
Even fresh homemade paneer can turn rubbery if you overcook it or boil it too hard in the gravy. The protein in paneer — called casein — contracts and tightens when exposed to high heat for too long. Keep the heat low and add paneer at the very end of cooking, off or away from direct flame.
Can I fix paneer that has already turned hard and rubbery?
Yes! Soak the already-cooked hard paneer cubes in hot water (not boiling) for about 10-15 minutes. It won’t be as perfect as freshly cooked soft paneer, but it does soften things up noticeably. You can then add it back into the warm gravy just before serving. It’s a rescue operation, not a miracle — but it works.
Should I fry paneer before adding it to curry?
Frying is optional — it adds a lovely golden crust and helps paneer hold its shape in a curry. But if you skip frying, the paneer actually stays even softer in the gravy because it hasn’t been exposed to high heat at all. If you do fry, keep it short (1-2 minutes per side on medium heat) and always dunk the fried cubes in warm water immediately afterward.
Does store-bought paneer become rubbery faster than homemade?
Almost always, yes. Store-bought paneer is pressed harder and longer during commercial production, giving it a denser starting texture. It also sometimes contains stabilizers that affect how it behaves under heat. The 15-20 minute warm-water soak makes a huge difference for store-bought. Homemade paneer is naturally more tender, but it still turns rubbery if overcooked.
How long can I keep paneer in the curry without it turning hard?
Once paneer is added to a hot curry on medium-high heat, it can start toughening up within 5-7 minutes. Always add paneer in the last 2-3 minutes on low heat, or stir it in after turning the flame off completely. When you reheat the dish the next day, do it gently and briefly — the paneer has already been cooked once and needs just enough heat to warm through.
3 thoughts on “Why Is My Paneer Rubbery? 6 Mistakes That Make Paneer Hard (And How to Fix Them)”