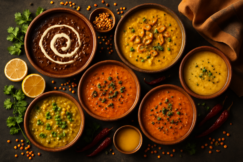
Why Is My Dal Watery? 8 Common Dal Mistakes and How to Fix Them
Why Is My Dal Watery? (And Why I’ve Been There More Times Than I Can Count)
I still remember the first time I served dal to my mother-in-law. She took one polite sip from her katori, set it down quietly, and said, “Beta, this is more like dal soup.” I wanted the earth to swallow me whole. The dal was thin, pale, and completely lacking the body and depth that her kitchen always produced. I had followed a recipe — or so I thought — but somewhere between the pressure cooker and the plate, something had gone very wrong.
If you’re here Googling “why is my dal watery,” first of all — welcome, you’re in good company. This is genuinely one of the most common questions I get from readers, especially from people cooking Indian food for the first time or from the Indian diaspora abroad who are working without the muscle memory their moms had. The answer isn’t always simple because dal can turn watery for about eight different reasons, and each one has a different fix. Over the years, I’ve made every single one of these mistakes myself, so this post is coming from a very honest, very unglamorous place.
Whether you’re making restaurant-style dal tadka, a simple everyday toor dal, or a creamy dal makhani, these principles apply across the board. Let’s fix your dal, once and for all.
Prep Time: 10 minutes | Cook Time: 30 minutes | Total Time: 40 minutes | Servings: 4
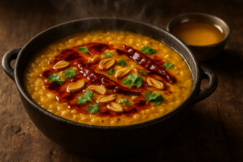
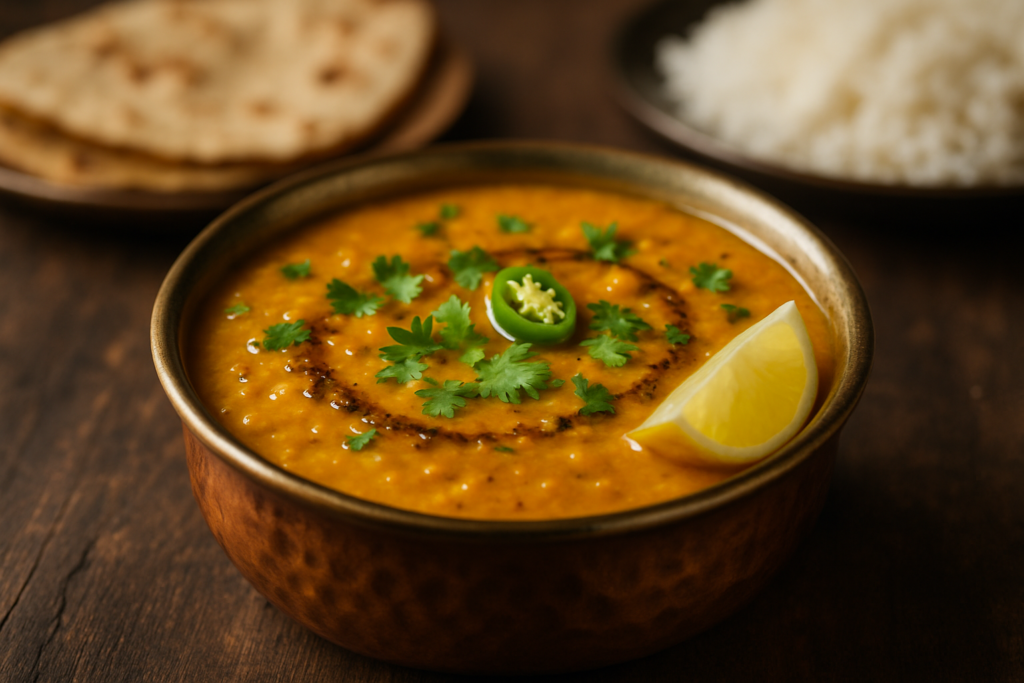
Dal turns watery because of too much water during cooking, under-mashing, skipping the right tadka technique, or using old lentils that never fully soften. The fixes are simple: reduce the water ratio, mash more aggressively, cook the tadka properly, and always finish with a simmer uncovered to build body.
Why You’ll Love Finally Getting Your Dal Right
- Restaurant-thick texture at home — once you understand what’s going wrong, your dal will have that gorgeous, coating-the-back-of-a-spoon consistency every single time
- More flavour, not just more thickness — most of these fixes also dramatically improve taste, not just texture
- Works for every dal variety — toor, masoor, moong, chana dal — the principles are universal
- No fancy tricks needed — just technique adjustments you can make with whatever you already have in your kitchen
- Saves you from that sinking feeling — when guests are coming and your dal is thin, you’ll know exactly what to do
Ingredients You’ll Need (For a Basic Dal Tadka Used in This Guide)
I’m using toor dal (arhar dal) as my reference throughout this post since it’s the most commonly made and the most commonly watered-down. Here’s what goes into a proper pot:
- 1 cup toor dal (split pigeon peas) — wash it 3-4 times until the water runs clear. Outside India, you’ll find this at any Indian grocery store. In a pinch, yellow split peas work but take longer to cook and have a slightly earthier flavour
- 2.5 to 3 cups water — not 4, not 5. This is your first fix right here
- 1 medium tomato, finely chopped
- 1 medium onion, finely chopped
- 4-5 garlic cloves, minced
- 1 inch ginger, grated
- 2 green chillies, slit
- 1 tsp cumin seeds (jeera)
- ½ tsp mustard seeds — optional but adds depth
- 1 tsp turmeric powder
- 1 tsp red chilli powder
- 1 tsp coriander powder
- ½ tsp garam masala
- Salt to taste
- 2 tbsp ghee — please don’t skip this. If you’re vegan, use a good neutral oil but ghee genuinely makes the tadka sing. Here’s why ghee is also nutritionally worth it
- Fresh coriander for garnish
- Juice of half a lemon — added at the end, not during cooking
Note for readers abroad: If you can’t find toor dal, red lentils (masoor dal) are widely available in supermarkets everywhere and cook faster. The fixes in this post still apply completely.
The 8 Real Reasons Why Your Dal Is Watery — And How to Fix Each One
Mistake 1: Too Much Water From the Start
This is the single most common reason why dal turns watery, and I’d bet it’s the culprit in most cases. When I first started cooking, every recipe said “add water” and I’d be standing there with my measuring cup being extremely generous. More water feels safer, right? The lentils won’t burn! But what you end up with is a soup, not a dal.
The fix: For pressure cooking toor dal or chana dal, use a 1:2.5 ratio of dal to water. For masoor or moong dal, even 1:2 can work. After pressure cooking, you should see the dal sitting in water, not swimming in it. If you’re cooking in a pot on the stove, start with less water than you think you need and add more only if required.
Mistake 2: Not Mashing the Dal Enough
Dal gets its body from the starch released when the lentils are mashed. If you just stir gently and serve, you’re leaving all that natural thickening potential untouched. My nani used to say that dal needs to be “broken down,” not just cooked. She’d take the back of her ladle and work in circles for a good three to four minutes. That motion released the starch and transformed a thin liquid into something with real body.
The fix: After pressure cooking, use either a mathani (hand churner) or simply the back of your ladle to mash the cooked dal vigorously. You don’t need it completely smooth — some texture is beautiful — but you do need to break down at least 70% of the lentils. You’ll visibly see the dal thicken as you mash. It’s genuinely satisfying.
Mistake 3: Adding Too Much Water After Mashing
You’ve cooked your dal perfectly, mashed it well, and then you think — oh, it looks quite thick, let me add some water to loosen it up. And then you add just a little too much. I’ve done this so many times. The dal looks right when it’s hot, but then it thins out further as you add the tadka and continue cooking.
The fix: If you need to adjust consistency after mashing, add hot water, not cold, and add it one tablespoon at a time. Remember that dal thickens further as it sits and cools, so what looks slightly thick when hot will be perfect at the table.
Mistake 4: Skipping the Open Simmer
After adding your tadka to the dal, a lot of people just stir and serve. But that five-to-ten minute uncovered simmer on medium-low heat is where the magic happens. The steam escapes, the consistency tightens, and the flavours from the tadka meld into the dal instead of just sitting on top.
The fix: After combining the tadka with your mashed dal, simmer uncovered on medium-low heat for at least 8-10 minutes, stirring occasionally. If your dal is very thin, this step alone can rescue it. Don’t put a lid on — you want the evaporation.
Mistake 5: Old or Stale Lentils That Never Fully Cook
This one surprised me when I first learned it. Lentils have a shelf life, and old lentils — even if they look fine — can take forever to soften and will never release their starch properly. If you’ve had that packet of toor dal sitting in your pantry for two years, this might be your problem. Old dal stays grainy and separate even after cooking, meaning there’s no creamy starch to thicken the liquid.
The fix: Buy fresh dal every six months or so. Before cooking, soak your dal for 20-30 minutes — this helps even slightly older lentils cook more evenly. If your dal still isn’t softening after normal pressure cooking time, give it one more whistle and check again.
Mistake 6: The Tadka Is Under-cooked or Wrong
I know the question is about why dal turns watery, but here’s something nobody tells you: an under-cooked tadka actually makes your dal taste watery even when the consistency is okay. Watery-tasting and watery-textured are connected. When the onions aren’t properly caramelised, when the tomatoes haven’t broken down completely, when the spices haven’t bloomed in the fat — the flavour stays flat and thin, and the whole dish reads as watery and underwhelming even if it’s technically thick enough.
The fix: Cook your tadka patiently. Onions should be golden brown, not just translucent. Tomatoes should completely break down into a paste. When you add your dry spices, they should sizzle in the oil for 30 full seconds before any liquid goes in. A proper tadka — done in enough ghee or oil — is the difference between dal that tastes alive and dal that tastes like it gave up.
Mistake 7: Not Soaking the Dal Before Cooking
I’ll admit I skip this when I’m in a hurry (and my husband will tell you it shows). Soaking dal for even 20-30 minutes before pressure cooking does three things: it reduces cooking time, it helps the dal cook more evenly, and crucially, it allows the lentils to swell and then release more starch during cooking — which means a thicker, creamier result. This is especially important for chana dal and toor dal.
The fix: Soak your dal for at least 30 minutes before cooking. If you’re using an Instant Pot or pressure cooker, you’ll also find you need fewer whistles/minutes, which means less steam escaping and better water control overall.
Mistake 8: Cooking Dal on Too High a Heat in an Open Pot
If you’re making dal on the stovetop (no pressure cooker), cooking on high heat causes rapid boiling which evaporates water unevenly. The outside of the lentils can get mushy while the inside stays hard, and you often end up adding more and more water to compensate — ending up with a thin, starchy broth rather than creamy dal. This is also how you get that slightly gummy, pasty texture that’s different from creamy-thick.
The fix: Bring to a boil, then reduce to a gentle simmer with the lid slightly ajar. Low and slow is the way. The lentils should be bubbling softly, not aggressively.
Tips for Perfect Dal Every Time — Beyond Just Fixing the Watery Problem
- Mash while hot: Dal is much easier to mash when it’s freshly pressure-cooked and hot. If you let it cool first, it becomes harder to break down and you’ll need to add water to loosen it, which defeats the purpose
- Taste before adding water: Once mashed, taste the dal before you decide it needs more water. Often it’s thick and slightly bland, and your instinct is to water it down — but the right move is to fix the flavour with tadka, not the consistency with water
- The lemon trick: Always add lemon juice at the very end, right before serving. Acid added during cooking can toughen lentils and prevent them from breaking down properly — something my cooking teacher pointed out when I was doing it completely wrong for years
- Use enough fat in the tadka: I know it’s tempting to cut back on ghee, but a proper dal tadka needs at least 2 tablespoons of fat for 4 servings. The fat is what carries the flavour of the spices into the dal
- Cover and rest: After finishing, cover the dal and let it rest for 5 minutes off the heat before serving. It thickens slightly and the flavours settle beautifully
Variations for Different Dietary Needs
Jain version: Skip the onion, garlic, and ginger entirely. Add asafoetida (hing) — a generous pinch — to your tadka and increase the cumin. Use tomatoes liberally for depth of flavour. The dal will still be thick and flavourful.
No-onion no-garlic: Same as above — hing, extra cumin, and a pinch of dried ginger powder (soonth) in the tadka work beautifully together.
Vegan: Swap ghee for coconut oil or a good quality refined sunflower oil. The tadka won’t have that nutty ghee aroma but will still be very tasty. Some people use vegan butter, which I think works reasonably well.
Gluten-free: Dal is naturally gluten-free. Just check your asafoetida packet if using — some brands add wheat flour as a filler. Look for pure hing or a GF-certified brand.
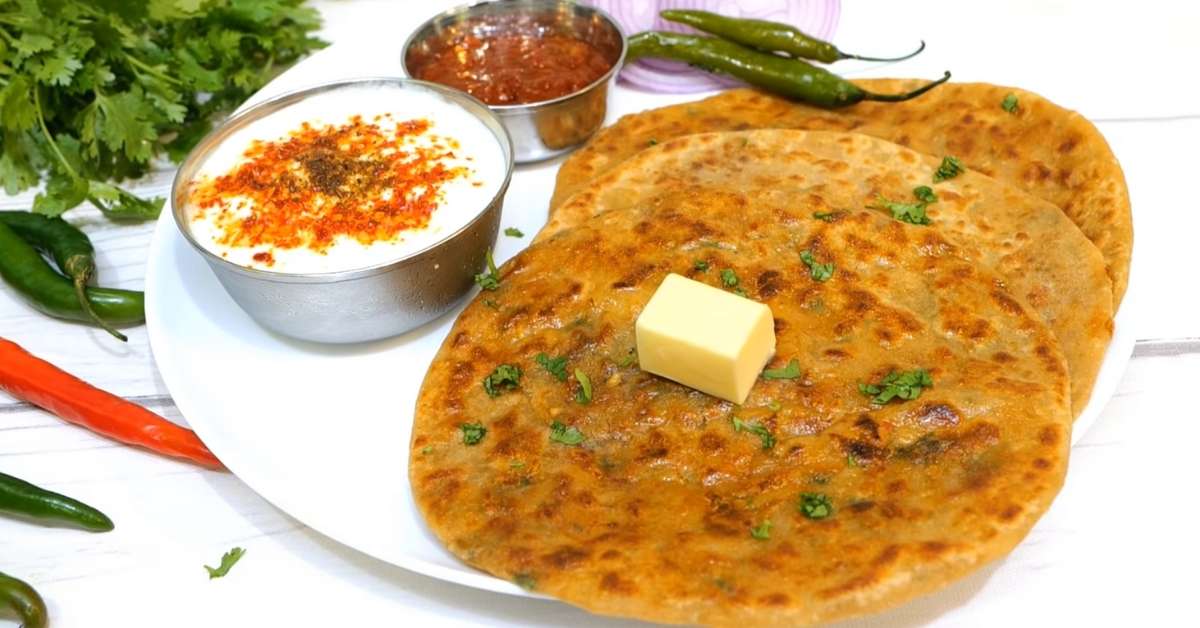
What to Serve With This Dal
A well-made, thick dal deserves the right accompaniments. Here are my favourites:
- Steamed basmati rice — the classic pairing. The dal should coat each grain, not pool at the bottom of your bowl
- Phulka or chapati — a properly thick dal is perfect for scooping with soft phulkas, the kind that puff up on the flame
- Jeera rice — check out my easy jeera rice recipe for a complete, restaurant-style dal-chawal experience at home
Storage and Reheating
Dal actually tastes better the next day — the flavours deepen overnight in the fridge. Store in an airtight container for up to 3 days in the refrigerator, or freeze for up to a month.
When reheating, dal will have thickened considerably in the fridge (this is normal and a sign you made it correctly!). Add a small splash of hot water — 2-3 tablespoons at most — stir well, and reheat gently on the stovetop or in a microwave with a lid on. Taste and adjust salt. If you want to refresh the flavour, a tiny fresh tadka of just ghee, cumin, and a pinch of chilli powder drizzled on top before serving makes it taste freshly made.
Frequently Asked Questions
Why is my dal watery even after pressure cooking?
This almost always comes down to too much water added before pressure cooking, or not mashing the dal after cooking. Use a 1:2.5 ratio of dal to water, and once pressure-cooked, mash the dal vigorously with the back of a ladle or a mathani before adding your tadka. The starch released during mashing is what gives dal its body.
How do I fix dal that’s already too thin without starting over?
The fastest fix is to simmer the dal uncovered on medium heat for 10-15 minutes — evaporation will naturally thicken it. You can also add a small amount of cooked and mashed dal (if you have leftovers) or stir in a teaspoon of besan (chickpea flour) dissolved in cold water and simmer for 5 minutes. I know purists will disagree with the besan trick, but it works in an emergency and you genuinely cannot taste it.
Why does my dal tadka taste bland and watery even when the consistency is okay?
Bland, flat-tasting dal usually means the tadka wasn’t cooked long enough. Onions must reach golden-brown (not just soft), tomatoes must completely break down into a paste, and dry spices must sizzle in the fat for at least 30 seconds before any liquid is added. Also check your salt — under-salted dal tastes flat regardless of how good the technique is.
Does soaking dal really make a difference to thickness?
Yes, genuinely. Soaked lentils cook more evenly, break down more completely, and release more starch — all of which contribute to a thicker final texture. Even a 20-minute soak makes a noticeable difference, especially for toor dal and chana dal. I skip soaking when I’m rushed and I always notice the difference on those days.
Can old dal cause watery consistency?
Absolutely. Lentils that are more than a year old (even if stored properly) can fail to soften and break down correctly, resulting in a grainy, thin dal rather than a creamy one. If your dal isn’t thickening despite doing everything right, stale lentils are a likely culprit. Buy fresh stock, soak before cooking, and you should see an immediate improvement.