Rava Upma Recipe: Fluffy, Non-Gluey Semolina Upma + 6 Regional Variations
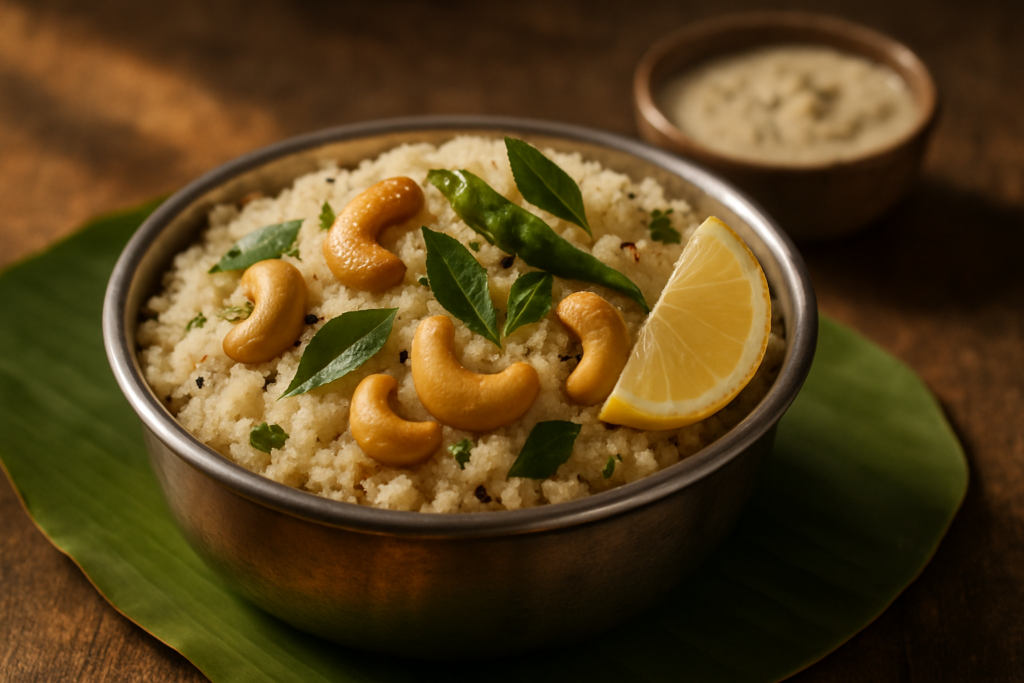
Fluffy, non-gluey rava upma comes down to three things: dry-roasting the semolina until nutty and fragrant, using fully boiling water, and streaming the rava in slowly while stirring rather than dumping it all at once. Get those right and the result is separate, fragrant grains with a good bite — not a brick. Here is how to do it, plus six regional variations.
Quick Recipe Snapshot
- Prep Time: 10 minutes
- Cook Time: 20 minutes
- Total Time: 30 minutes
- Servings: 4
This is a classic South Indian semolina upma made with dry-roasted rava, a generous ghee tadka, and hot boiling water — the three secrets to grains that stay fluffy and separate instead of clumping. It comes together in 30 minutes and is naturally vegetarian, easily made vegan, and endlessly adaptable with regional twists.
Why You’ll Love This Rava Upma Recipe
- Genuinely quick weekday breakfast — 30 minutes from cold pan to hot bowl, and most of that is mostly passive time.
- One pan, minimal cleanup — the entire thing happens in a single heavy-bottomed pan.
- Fixes the most common upma problem — exactly why upma turns sticky and lumpy, and how to stop it from happening ever again.
- Pantry-friendly — rava, dal, mustard seeds, curry leaves. If you cook Indian food at all, you likely have everything already.
- Six variations in one post — from Mangalorean style to Punjabi-ish to a fully loaded vegetable version, there’s a reason to keep coming back.
Ingredients You’ll Need for the Perfect Upma
Browse all our South Indian breakfast recipes if you want more ideas for what to serve alongside — but for now, here’s what goes into this one:
- 1 cup rava (semolina / sooji) — Medium-fine is my preference. In the UK, US, or Canada, look for semolina in Indian grocery stores or online. Regular coarse pasta-grade semolina works in a pinch but gives a slightly different texture.
- 2 cups water (plus ½ cup extra kept warm on the side)
- 2 tablespoons ghee — Ghee makes the biggest difference to flavour. For vegan: use coconut oil or a neutral oil. Ghee has a higher smoke point than butter and adds a rich, nutty flavour that’s hard to replicate.
- 1 teaspoon mustard seeds
- 1 teaspoon urad dal + 1 teaspoon chana dal — These add little nutty, crunchy bits throughout. Outside India, find them at any South Asian grocery. No substitute needed — just leave them out if you must, the upma will still be good.
- 10–12 fresh curry leaves — Fresh is non-negotiable for flavour. If you’re abroad and can’t find them, dried curry leaves work at about half the quantity. Growing your own curry leaf plant is genuinely worth it if you cook Indian food regularly.
- 2 dried red chillies, broken
- 2 green chillies, slit — Adjust to your heat preference.
- 1 medium onion, finely chopped
- 1 teaspoon grated ginger
- 2 tablespoons roasted cashews — You can use raw cashews and roast them in the tadka. Peanuts are a good budget substitute.
- 2 tablespoons green peas (optional, frozen is fine)
- Salt to taste
- 1 teaspoon lemon juice
- 2 tablespoons fresh coriander, chopped
- A pinch of asafoetida (hing) — Skip for gluten-free (most commercial hing contains wheat flour). Use certified GF hing if needed.
How to Make Fluffy Rava Upma — Step by Step
- Dry-roast the rava first. This is the step most people skip and the reason most upma fails. Place the rava in a dry, heavy-bottomed pan over medium heat. Stir it almost continuously for 4–5 minutes. You’re looking for a warm, nutty, almost popcorn-like aroma and the faintest colour change — a few grains going very lightly golden. Do NOT let it brown. Tip it out onto a plate and let it cool completely before you do anything else. Warm rava added to boiling water turns paste-like immediately.
- Boil your water separately. Get 2 cups of water boiling in a small pot or kettle. Keep the extra ½ cup warm. Hot water is essential — this cannot be stressed enough.
- Make the tadka. In the same pan you used for roasting (wiped clean), heat the ghee over medium heat. Add mustard seeds. Wait — actually wait — until they pop and splutter before moving on. This tells you the oil is hot enough.
- Add the dals and aromatics. Toss in the urad dal and chana dal. Stir and fry until they turn a lovely golden colour, 30–40 seconds. Add the dried red chillies, curry leaves (be ready — they will spit!), and the pinch of hing. Stir for 10 seconds.
- Fry the cashews. Add the cashews to the oil and stir until they pick up some golden colour. Then add the green chillies and grated ginger, stir for 15 seconds until fragrant.
- Cook the onions. Add the chopped onions with a pinch of salt and sauté on medium heat, stirring occasionally, until they’re soft, translucent, and just starting to turn lightly golden at the edges — about 3–4 minutes. Don’t rush this on high heat; the onions need to sweat properly. Add peas here if using.
- Add the boiling water. Turn the heat to medium-high. Pour in the hot water. Add salt to taste (remember the upma will absorb all of this water, so season properly). Bring to a full rolling boil — you want big bubbles.
- Stream in the rava — slowly. Reduce heat to medium. With one hand holding the plate of cooled rava and the other holding a spoon, pour the rava into the boiling water in a slow, thin stream while stirring constantly with the other hand. Never stop stirring. This is the heart of the technique. If you dump it all at once, you get lumps. Period.
- Stir until absorbed. Keep stirring on medium heat for 2–3 minutes. The rava will absorb the water quickly and the mixture will thicken. If it looks too stiff or dry before it smells fully cooked, add warm water a few tablespoons at a time, stirring in between.
- Steam with the lid on. Turn the heat to its absolute lowest setting. Cover tightly and let it steam for 3–4 minutes. This finishes cooking the rava gently and is what gives you that fluffy, grain-separated texture.
- Finish and serve. Open the lid, fluff gently with a fork, taste for salt, add the lemon juice and fresh coriander. Serve immediately — upma is best eaten hot.
Tips for Perfect Rava Upma Every Time
- Roast in batches and store. Roasting a large batch of rava and storing it in an airtight jar works well. It keeps for 2–3 weeks at room temperature and takes one step off the weekday morning process entirely.
- Water temperature is everything. The water going into the pan must be at a full boil. If it cools down while you’re doing something else, bring it back to a boil before adding the rava.
- The pan matters. Use a heavy-bottomed pan — a good old steel or hard-anodised one. Thin pans create hot spots and that’s where sticking and burning happen.
- Don’t skimp on the ghee. I know purists will disagree and I respect that, but a stingy hand with ghee is another reason upma comes out sticky. The fat coats the grains and keeps them separate. Two tablespoons for four servings is not excessive — it’s correct.
- Season the water, not just the tadka. Add your main salt to the boiling water before the rava goes in. You want the rava to absorb seasoned water. Trying to add salt after the rava is in results in uneven seasoning and overmixing.
6 Regional Rava Upma Variations Worth Making
Upma isn’t just one dish — it’s a framework. Upma has regional variations across South India that are each wonderful in their own right. Here are six worth making:
1. Karnataka-Style Upma (Khara Bath)
This is a richer, more intensely spiced version with a generous spoon of bisi bele bath powder or a special masala paste added to the tadka. Tomatoes go in with the onions, and the whole thing has a deeper, almost curry-like flavour. Sometimes a spoon of coconut is stirred in at the end. It’s heavier than the standard version and absolutely wonderful on a cold morning.
2. Tamil Nadu Temple-Style Upma
No onion, no garlic, very simple. The flavour comes entirely from good ghee, plenty of curry leaves, generous ginger, and a handful of grated fresh coconut stirred through at the end. If you’ve eaten prasad upma at a South Indian temple, this is that recipe. It’s humbling in its simplicity.
3. Andhra-Style Upma (Uppudi Pindi)
Andhra upma uses a coarser rava and goes heavier on the green chillies — this is spicy upma. Lemon is mandatory here and is added quite generously. Some families also add a small amount of grated carrot and beans.
4. Mangalorean Rava Upma
This version adds a tablespoon of freshly grated coconut and sometimes a small amount of jaggery — yes, a tiny sweetness — which balances the spice and lemon beautifully. The Mangalorean style also tends to use coconut oil instead of ghee, which gives it a distinctly coastal flavour.
5. Loaded Vegetable Upma
Adding finely chopped carrots, beans, capsicum, and peas to the onion stage and letting them cook through before the water goes in turns upma into a full meal rather than just a snack. A pinch of turmeric gives it a pretty golden colour. This version packs well in tiffin boxes.
6. Rava Upma with Coconut Milk (Kerala Style)
Replace half the water with thin coconut milk. The result is a creamier, slightly richer upma with a gentle sweetness that’s very different from the standard version. I know purists from other states will raise an eyebrow, but Kerala home cooks have been doing this for generations and they are not wrong.
Jain, No-Onion-No-Garlic, Vegan, and Gluten-Free Notes
- Jain / No-onion-no-garlic: Skip the onions and garlic entirely. Increase ginger to 1.5 teaspoons and add a small, finely chopped tomato with the tadka for tanginess. The temple-style version above is essentially this.
- Vegan: Swap ghee for coconut oil or any neutral oil. The upma will lose some richness but a teaspoon of coconut oil added at the end right before serving helps compensate.
- Gluten-free: Semolina (rava) is made from wheat and is NOT gluten-free. For a GF version, use rice rava (arisi rava) — the process is the same but cook time increases slightly and you’ll need slightly more water. Also ensure your asafoetida is certified gluten-free.
What to Serve With Rava Upma
Honestly? A cup of strong filter coffee is the traditional and correct answer. But here are proper accompaniments:
- Coconut chutney — The classic pairing. The cool, creamy chutney against the hot, savoury upma is one of those perfect food combinations. Try our easy coconut chutney recipe here.
- Tomato chutney or tomato gojju — Slightly tangy and spiced, this is particularly good with the Karnataka-style version.
- Yogurt / Curd — Simple, cooling, and perfect. A spoonful of plain yogurt on the side of your upma bowl is exactly what you need on a hot morning.
Storage and Reheating
Upma is absolutely best eaten fresh and hot right off the pan. That said:
- Refrigerator: Store cooled upma in an airtight container for up to 2 days. It will firm up significantly in the fridge — this is normal.
- Reheating on stovetop: Add 2–3 tablespoons of water to the pan, add the cold upma, cover and heat on low for 3–4 minutes, stirring once or twice. It loosens up beautifully.
- Reheating in microwave: Sprinkle water over the upma, cover with a damp paper towel or microwave-safe lid, and heat for 90 seconds, stirring once halfway through.
- Freezing: Freezing upma is not recommended — the texture becomes quite unpleasant after thawing. Make it fresh; it only takes 30 minutes.
- Leftover upma tip: Cold leftover upma can be shaped into small patties and shallow-fried in oil until crispy on both sides. It’s a completely different thing and absolutely delicious with tea.
Check out our Indian breakfast meal prep guide for more ideas on getting weekday mornings under control without sacrificing a good tiffin.
Frequently Asked Questions About Rava Upma Recipe
Why is my upma sticky and lumpy every time?
The two most common culprits are unroasted rava and adding cold water. Always dry-roast your semolina first until nutty and fragrant, and always add boiling hot water to the tadka. The third reason is pouring all the rava at once instead of adding it in a slow stream while stirring. Fix these three things and your upma will never be gluey again.
Can I use fine rava or only coarse rava for upma?
Both work, but they behave differently. Fine rava gives a softer, more delicate upma. Medium or slightly coarse rava gives that distinct grainy, restaurant-style texture most people associate with South Indian upma. Medium rava is my preference. Avoid the very coarse variety used for halwa — it stays slightly gritty in upma.
What is the ideal water-to-rava ratio for fluffy upma?
For 1 cup of dry-roasted rava, use 2 to 2.5 cups of water. If you like your upma on the drier and fluffier side, go with 2 cups. If a slightly softer texture is preferred, use 2.5 cups. The golden rule: always keep a little extra warm water nearby to adjust on the fly.
Can I make rava upma without onion and garlic?
Absolutely, and it is just as delicious. Skip the onions and garlic entirely. Increase the ginger slightly and add a small piece of finely chopped tomato for a hint of tang. Many temples and Jain households serve exactly this version and it is wonderful.
How do I reheat leftover upma without it drying out?
Leftover upma tends to turn stiff in the fridge. To reheat, sprinkle 2–3 tablespoons of water over it, cover with a lid or damp paper towel, and microwave for 90 seconds, stirring once halfway through. On the stovetop, add a splash of water and stir on low heat with the lid on for a couple of minutes. It comes back to life beautifully.