Methi Thepla Recipe: Gujarati Flatbread That Stays Soft for 3 Days (Perfect for Travel and Lunchboxes)
Methi Thepla: Gujarati Flatbread That Stays Soft for 3 Days
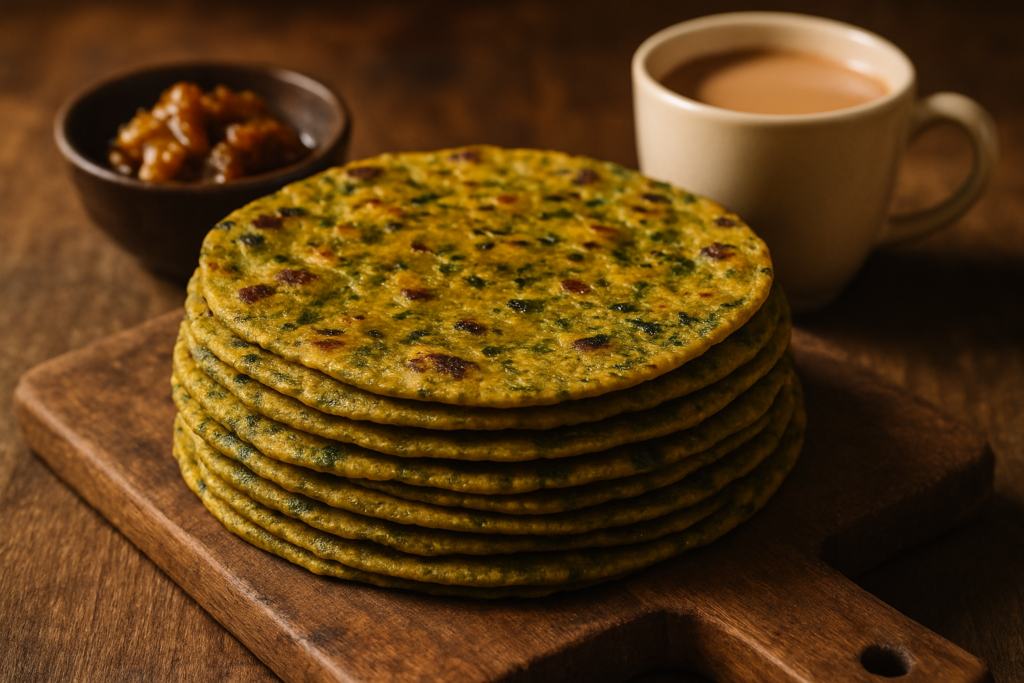
Methi thepla is a spiced Gujarati flatbread made with fresh fenugreek leaves, whole wheat flour, yogurt, and warming spices. These soft, pliable flatbreads stay fresh at room temperature for up to 3 days, making them ideal for travel, lunchboxes, and meal prep. The key is the right ratio of oil and curd in the dough — and stacking the theplas immediately off the tawa so they steam themselves soft as they cool.
Thepla is quintessentially Gujarati soul food. Unlike a plain roti or even a paratha, thepla has a beautiful complexity — the bitterness of fenugreek (methi), the tang of yogurt, the warmth of spices — all rolled into a thin, soft, travel-friendly flatbread that gets better as the hours go by.
Prep Time: 20 minutes
Cook Time: 30 minutes
Total Time: 50 minutes
Servings: 4 (makes approximately 12–14 theplas)
Summary: Methi thepla is a spiced Gujarati flatbread made with fresh fenugreek leaves, whole wheat flour, yogurt, and warming spices. These soft, pliable flatbreads stay fresh at room temperature for up to 3 days, making them ideal for travel, lunchboxes, and meal prep.
Why You’ll Love This Methi Thepla Recipe
- Stays soft for 3 days: The right ratio of oil and curd in the dough keeps theplas pliable and soft — not hard, not dry — even after 48–72 hours at room temperature. This is literally the whole reason Gujaratis take them on every trip.
- Nutritious and filling: Fenugreek leaves are packed with iron and fibre. Combined with whole wheat flour and yogurt, this is genuinely a wholesome meal in flatbread form. Healthline covers the impressive health benefits of fenugreek if you want to nerd out on the nutrition.
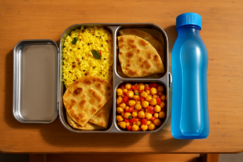
- Perfect for lunchboxes and travel: No reheating required. Eat them at room temperature with pickle, curd, or just on their own.
- Beginner-friendly: If you can make roti, you can absolutely make thepla. The dough is actually more forgiving than plain roti dough because the oil content makes it softer and easier to roll.
- Easily customizable: Jain version, vegan version, gluten-free adaptations — all covered below.
Ingredients You’ll Need for This Gujarati Thepla Recipe
A note for readers abroad: fresh methi (fenugreek leaves) can be hard to find outside Indian grocery stores. Substitutions are listed right here so you’re not stuck.
- 1.5 cups whole wheat flour (atta) — Use chapati flour. If you’re in the UK or USA, look for “chakki atta” at any Indian grocery store. In a pinch, half whole wheat and half all-purpose flour works.
- 1.5 cups fresh methi (fenugreek) leaves, tightly packed — Washed, picked off stems, and roughly chopped. Abroad substitute: Use 3–4 tablespoons of dried kasuri methi (fenugreek leaves), soaked in 2 tablespoons of warm water for 10 minutes. The flavour is more concentrated so use less. Frozen methi, found at most Indian stores abroad, also works beautifully.
- 3 tablespoons plain yogurt (dahi) — Full-fat yogurt gives the best texture. Slightly sour yogurt is actually ideal — the acidity helps keep theplas soft longer.
- 2 tablespoons oil — For the dough. Plus extra for cooking. Sunflower or groundnut oil works well. Sesame oil (til oil) is the traditional Gujarati choice and gives a lovely nutty depth.
- 1 teaspoon turmeric powder (haldi)
- 1 teaspoon red chilli powder — Adjust to taste.
- 1 teaspoon coriander-cumin powder (dhania-jeera)
- ½ teaspoon sesame seeds (til) — Optional but highly recommended for that authentic texture and flavour.
- ½ teaspoon sugar — This is a Gujarati recipe, and a tiny pinch of sugar genuinely balances the bitterness of methi. Don’t skip it.
- Salt to taste
- Water for kneading — You’ll need very little, maybe 2–3 tablespoons, because the methi leaves release moisture.
How to Make Soft Thepla: Step-by-Step Instructions
- Prep the methi leaves: Rinse the fresh methi leaves in two changes of water (methi can be sandy). Shake off excess water, roughly chop the leaves, and sprinkle a small pinch of salt over them. Toss and let sit for 5 minutes. This step draws out a little bitterness. After 5 minutes, squeeze the leaves gently with your hands to remove any liquid. This is a step most recipes skip — don’t skip it.
- Make the dough: In a large mixing bowl, combine the whole wheat flour, turmeric, red chilli powder, coriander-cumin powder, sesame seeds, sugar, and salt. Mix the dry ingredients together first so the spices distribute evenly. Now add the prepared methi leaves, the yogurt, and the 2 tablespoons of oil. Mix everything together. The methi and yogurt will release some moisture as you work the dough. Knead for 3–4 minutes. The dough should feel soft, smooth, and slightly tacky — not sticky. Add water, just a tablespoon at a time, only if the dough feels too dry and is cracking. No more than 2–3 tablespoons total should be needed.
- Rest the dough: Cover the dough with a damp cloth or plate and let it rest for 15 minutes. This is important — it allows the gluten to relax, which makes rolling much easier and results in softer theplas. Don’t skip this rest period.
- Divide and roll: After resting, knead the dough once more for a minute. Divide it into 12–14 equal balls, roughly the size of a golf ball. Flatten a ball between your palms, dust it lightly in flour, and roll it out on a clean surface into a thin round — roughly 6–7 inches in diameter. Thepla should be thinner than a paratha but not as paper-thin as a roti. Aim for about 2–3mm thickness.
- Cook on the tawa: Heat a flat tawa or cast iron skillet over medium-high heat until hot — not smoking, but hot enough that a drop of water sizzles and evaporates immediately. Place a rolled thepla on the hot tawa. Within about 30–40 seconds, you’ll see bubbles forming on the surface and the colour will change slightly. Flip it. Drizzle about ¼ teaspoon of oil on the cooked side. After another 30 seconds, flip again and drizzle a little oil on this side too. Press gently with a folded cloth or spatula. Cook until both sides have golden-brown spots and the thepla is cooked through — total cooking time per thepla is about 1.5–2 minutes. It should smell toasty and nutty.
- Stack and store correctly: As each thepla comes off the tawa, immediately stack it on a plate and cover with a cloth. The steam from the hot theplas keeps them moist and soft as they cool together. Don’t spread them out to cool individually — they’ll dry out and become stiff. Once completely cool, store in an airtight container or wrap in a clean cotton cloth.
Tips for Perfect Methi Thepla Every Time
The Oil Ratio Is Everything
The single biggest reason theplas turn hard is not enough oil in the dough and while cooking. Don’t be shy with it. Those 2 tablespoons in the dough are non-negotiable. And that small drizzle on each side while cooking? That’s what creates the soft, slightly glossy surface that stays pliable for days.
Slightly Sour Curd Works Best
Slightly sour yogurt is actually ideal for thepla dough. The lactic acid in sour curd not only adds flavour but also acts as a natural preservative, which is part of why theplas keep so well at room temperature. Fresh yogurt works too, but the difference is noticeable.
Don’t Skip the Salt-and-Squeeze Step on the Methi
Methi is naturally bitter — that’s part of its charm. But too much bitterness can overpower the thepla. Salting the leaves and squeezing out the liquid tames the bitterness to a pleasant level. If you love the strong methi flavour, you can skip this step entirely.
Medium-High Heat, Not High
The tawa should be hot but controlled. If the thepla is browning too fast on the outside before cooking through, it’ll taste raw and doughy in the middle. Medium-high is the sweet spot.
Use Fresh Methi When You Can
Dried kasuri methi works as a substitute but fresh methi gives the thepla a vibrant green colour, a softer texture, and a much more alive flavour. If you have an Indian grocery store nearby, it’s worth seeking out fresh leaves. Methi also grows well in kitchen window boxes.
Variations of This Gujarati Thepla Recipe
Jain Methi Thepla (No Onion, No Garlic)
The classic methi thepla recipe is already Jain-friendly. There’s no onion or garlic in the traditional version. Some families also avoid root vegetables (like added grated carrot or radish), so this base recipe is perfectly suited for Jain cooking. Just ensure your curd is fresh and made from cow’s milk per your family’s standards.
Vegan Thepla
Replace the dairy yogurt with thick coconut yogurt or any plain, unsweetened plant-based yogurt. The texture is almost identical. Oat yogurt and almond yogurt both work well. Skip any ghee finishing touch for a strict vegan version; the oil-based version is just as good.
Gluten-Free Thepla
Use a 50-50 blend of jowar (sorghum) flour and bajra (pearl millet) flour in place of wheat flour. The dough will be more crumbly and require slightly more yogurt to come together. Roll between two sheets of parchment paper rather than on a floured board. Gluten-free theplas are a bit more fragile but taste wonderful.
Mixed Flour Thepla
A popular variation uses a mix of whole wheat flour, besan (chickpea flour), and bajra flour. The besan adds a nutty flavour and extra protein. A ratio of 1 cup atta + ¼ cup besan + ¼ cup bajra works well.
What to Serve With This Methi Thepla Recipe
Thepla is a complete meal on its own. But if serving fresh and hot at home, here’s what pairs beautifully:
- Mango pickle (aam ka achaar): This is the non-negotiable pairing. The sharp, oily, spiced pickle cuts right through the earthiness of methi. Try a homemade mango pickle recipe if you want to make your own.
- Fresh yogurt (dahi): Cool, creamy plain yogurt alongside hot thepla is a classic pairing. A little drizzle of honey over the yogurt, Gujarati style, is an excellent combination.
- Masala chai: For breakfast or a travel snack, thepla + cutting chai is an unbeatable combination.
For travel and lunchboxes, thepla travels beautifully with a small container of Gujarati dry potato sabzi (batata nu shaak) — another zero-moisture dish that keeps well at room temperature.
Storage and Reheating
Room temperature: Store theplas in an airtight container or wrapped in a clean cotton cloth at room temperature for up to 3 days. This is the traditional method and genuinely works, especially in cooler weather. In hot, humid climates, 2 days is a safer limit.
Refrigerator: Refrigerate in an airtight container for up to 5–6 days. The theplas will firm up when cold — this is normal. They’ll soften again once reheated.
Freezer: Theplas freeze beautifully. Layer them between pieces of parchment paper and freeze in a zip-lock bag for up to 2 months. A double batch specifically for the freezer is worth making.
Reheating: The best way to reheat is on a dry tawa for 30–45 seconds per side on medium heat. You can also microwave for 20 seconds wrapped in a damp paper towel. Avoid microwaving without moisture — they’ll turn rubbery. For frozen theplas, thaw at room temperature for 30 minutes then reheat on the tawa.
Frequently Asked Questions About Methi Thepla
Why are my theplas turning hard and stiff after cooling?
This almost always comes down to two things: not enough oil in the dough, or spreading the theplas out individually to cool instead of stacking them. Stack them immediately as they come off the tawa, cover with a cloth, and let them steam themselves soft as they cool. Also double-check your oil quantities in the dough — 2 tablespoons for 1.5 cups flour is the minimum.
Can I use kasuri methi (dried fenugreek) instead of fresh methi leaves?
Yes, absolutely. Use 3–4 tablespoons of kasuri methi, soak it in 2 tablespoons of warm water for 10 minutes, then drain and add to your dough. The flavour will be more concentrated and slightly different from fresh, but still delicious. Reduce to 2 tablespoons if you’re sensitive to bitterness.
How do I make thepla that stays soft for 3 days specifically for travel?
Three things matter most for travel theplas: (1) slightly sour yogurt in the dough, (2) enough oil both in the dough and while cooking, and (3) wrapping in a dry cotton cloth rather than plastic wrap. Cotton allows the theplas to breathe without drying out. Plastic can cause condensation which leads to sogginess. A clean muslin cloth works well.
Can I make the dough ahead of time?
Yes. The dough keeps well in the refrigerator for up to 24 hours, covered with cling wrap or in an airtight container. Resting the dough overnight actually makes it more flavourful. Remove from the fridge 20 minutes before rolling to bring it to room temperature. The methi leaves will continue to release some liquid overnight, so the dough may be a bit softer — just knead it again with a little dry flour if needed.
Is methi thepla healthy?
It’s genuinely nutritious, yes. Fenugreek leaves are rich in iron, calcium, and fibre, and are known to support blood sugar regulation. Whole wheat flour adds complex carbohydrates and additional fibre. The yogurt contributes protein and probiotics. The oil content means it’s not diet food, but as everyday flatbreads go, thepla is one of the more wholesome options. Compared to white bread or processed snacks for travel? No contest.