Pav Bhaji Masala vs Garam Masala: The Real Difference (And When You Can Substitute)
Pav bhaji masala and garam masala are not interchangeable. Pav bhaji masala contains amchur and anardana, which give it a characteristic tang that garam masala entirely lacks. Substituting one for the other without adjustments produces a dish that tastes noticeably different. This post explains exactly what sets them apart and what to do when you’re out of one.
Today the aim is to break it all down — what each spice blend actually contains, how they smell and taste different, and what to do when you’re in a pinch. Also included at the end is a classic Mumbai-style pav bhaji recipe, because understanding spice blends is only half the picture — using them well is the other half. But first, let’s settle the pav bhaji masala vs garam masala debate once and for all.
Prep Time: 10 minutes | Cook Time: 5 minutes (for homemade substitute blend) | Total Time: 15 minutes | Servings: Makes about 4 tablespoons of homemade pav bhaji masala substitute
Pav bhaji masala and garam masala are not the same thing — pav bhaji masala is tangier, more complex, and includes dried mango powder and pomegranate seeds, while garam masala is warming and aromatic. You can substitute in an emergency, but you’ll need to add extra sourness. This post tells you exactly how.
Pav Bhaji Masala vs Garam Masala: What Are They, Actually?
Here is what each of these spice blends is doing in your kitchen before comparing them head-to-head.
What Is Pav Bhaji Masala?
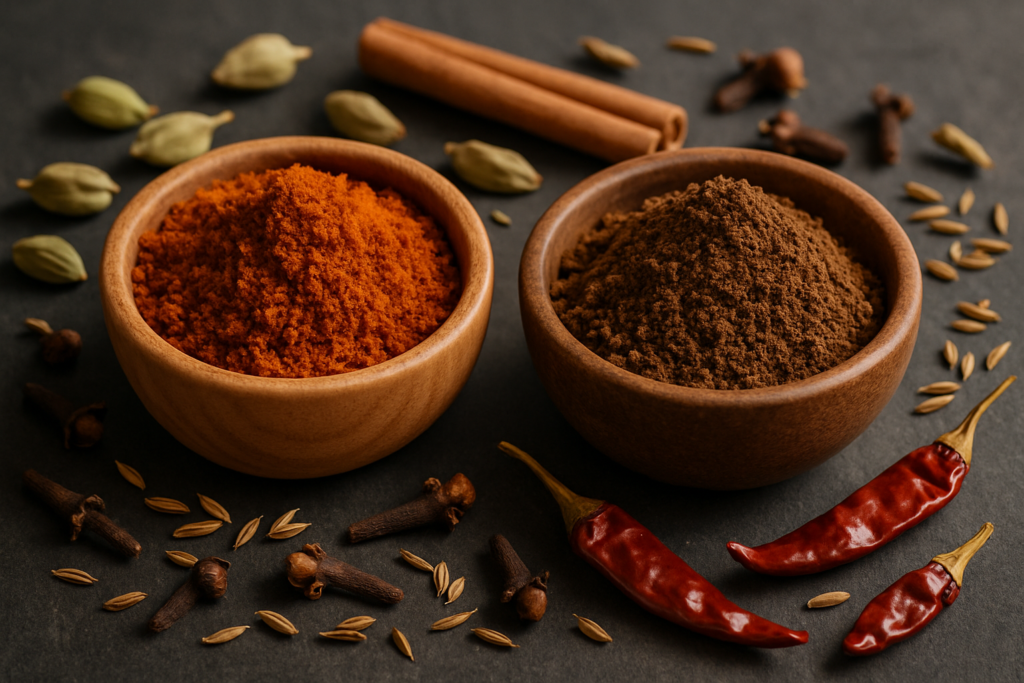
Pav bhaji masala is a proprietary spice blend created specifically for — you guessed it — pav bhaji. It’s a slightly coarse, reddish-brown powder with a distinctive tang that sets it apart from almost every other Indian spice blend. The star of pav bhaji masala’s flavor profile is its sourness, which comes from amchur (dried mango powder) and sometimes anardana (dried pomegranate seeds). This is the ingredient that gives the bhaji its signature bite.
A typical pav bhaji masala contains:
- Coriander seeds
- Cumin
- Dried red chilies
- Amchur (dried mango powder)
- Anardana (dried pomegranate powder)
- Fennel seeds
- Black pepper
- Cloves
- Cinnamon
- Cardamom
- Dry ginger
- Kashmiri red chili (for color)
Pav bhaji masala has some overlap with garam masala — things like cloves, cinnamon, cardamom — but it also has ingredients that garam masala absolutely never contains, especially those sour agents. Pav bhaji originated in Mumbai in the 1850s as a quick meal for textile mill workers, and the masala was designed to create a bold, tangy flavor profile fast.
What Is Garam Masala?
Garam masala is arguably the most versatile spice blend in the Indian kitchen. The name literally means “hot spices” — not spicy-hot like chili, but warming in the Ayurvedic sense. It’s used as a finishing spice in hundreds of dishes, from dal makhani to biryani to paneer tikka masala.
A classic garam masala typically contains:
- Cumin
- Coriander
- Black pepper
- Cardamom (both green and black)
- Cloves
- Cinnamon
- Bay leaves
- Nutmeg (sometimes)
- Star anise (in some regional versions)
Garam masala is purely warm and aromatic — no sourness, no Kashmiri chili for color, no amchur. It’s a finishing spice, meaning you typically add it at the very end of cooking. Its job is to add fragrance and depth, not to define an entire dish’s character the way pav bhaji masala does.
If you want to go deeper into the science of spice blends, Healthline has a solid breakdown of garam masala’s nutritional and health properties that’s worth a read.
Pav Bhaji Masala vs Garam Masala: The Side-by-Side Comparison
The confusion mostly comes from the fact that both are brown powders in similar-looking jars:
| Feature | Pav Bhaji Masala | Garam Masala |
|---|---|---|
| Flavor profile | Tangy, bold, slightly spicy, earthy | Warm, aromatic, complex but mellow |
| Key distinguishing ingredient | Amchur + anardana (sour agents) | None — it’s balance of warm spices |
| Color | Deep reddish-brown | Medium warm brown |
| When to add in cooking | During cooking (mid-way) | At the end as a finisher |
| Can it replace the other? | With modifications, yes | With modifications, yes |
| Best used for | Pav bhaji, chole variations, some chaats | Curries, dals, biryanis, marinades |
Can You Use Garam Masala Instead of Pav Bhaji Masala?
Yes — but with caveats. Some sources will say “absolutely, just use garam masala!” and leave it at that. That’s not the full story.
If you swap garam masala 1:1 for pav bhaji masala, your bhaji will taste like a generic vegetable curry. It won’t be bad — it’ll probably taste quite nice — but it won’t taste like pav bhaji. That tang, that characteristic punch, will be missing.
Here’s an emergency substitute formula:
Homemade Pav Bhaji Masala Substitute (Emergency Recipe)
Mix together:
- 1 tablespoon garam masala
- 1 teaspoon amchur powder (this is non-negotiable — it’s the soul of the substitute)
- ½ teaspoon Kashmiri red chili powder (for color and mild heat)
- ½ teaspoon cumin powder
- ¼ teaspoon fennel powder
- A pinch of black salt (kala namak — adds that funky depth)
This won’t be identical to store-bought pav bhaji masala, but it’ll get you 80-85% of the way there. And the sourness can be adjusted to taste.
What If You’re Going the Other Direction — Pav Bhaji Masala Instead of Garam Masala?
This one trips people up less often, but it does happen. If a curry recipe calls for garam masala and you only have pav bhaji masala, use about half the quantity and know that your curry will have a slightly tangy, Mumbai-ish edge. For some dishes — chole, for instance — this is actually wonderful. For a classic dal makhani or palak paneer, it’ll work but the flavor profile will shift noticeably.
Why You’ll Love Making Your Own Pav Bhaji Masala at Home
- You control the sourness level — the amchur quantity is entirely adjustable depending on how tangy you want the result.
- No preservatives or fillers — many commercial blends add anticaking agents and sometimes even rice flour. Homemade is cleaner.
- It takes 10 minutes — once you have the individual spices (which most Indian kitchens already have), this is genuinely quick.
- You’ll understand the flavor better — when you build the blend yourself, you intuitively understand how to adjust it mid-recipe.
- Great for the diaspora — if you’re outside India and can’t find good pav bhaji masala, this solves the problem completely.
Ingredients You’ll Need for Homemade Pav Bhaji Masala
These quantities make about 6-7 tablespoons of masala, enough for 3-4 batches of pav bhaji:
- 3 tablespoons coriander seeds
- 1½ tablespoons cumin seeds
- 1 tablespoon amchur powder — if you’re abroad, look for “dry mango powder” at any South Asian grocery or online. This is essential.
- 1 teaspoon anardana powder (dried pomegranate seed powder) — substitute with an extra ½ teaspoon amchur if unavailable
- 2 teaspoons Kashmiri red chili powder — outside India, use ¾ sweet paprika + ¼ cayenne to mimic the color and mild heat
- 1 teaspoon black pepper, whole
- 5-6 cloves
- 1 inch cinnamon
- 3-4 green cardamom pods
- 1 black cardamom pod
- 1 teaspoon fennel seeds
- ½ teaspoon dry ginger powder
- ¼ teaspoon black salt (kala namak) — this is a personal addition, not in every recipe, but I think it makes a real difference
- Salt to taste
Step-by-Step: How to Make Pav Bhaji Masala at Home
- Gather all your whole spices — coriander seeds, cumin seeds, black pepper, cloves, cinnamon, both cardamoms, and fennel seeds. Measure them out and keep them ready. Have the powders (amchur, anardana, Kashmiri chili, dry ginger) set aside in a separate small bowl — these won’t be dry-roasted.
- Dry roast the whole spices — heat a heavy-bottomed pan or tawa on medium-low flame. No oil, no butter — completely dry. Add all the whole spices and roast for 3-4 minutes, stirring constantly, until they turn a slightly darker shade and you can smell a deep, toasty aroma. Watch them carefully — a few seconds of inattention and they’ll burn, which makes the whole batch bitter.
- Cool completely — this is important and people skip it. Pour the roasted spices onto a plate and spread them out. Let them cool for at least 10 minutes. Grinding warm spices creates steam inside the grinder and can make your powder clump.
- Grind to a fine powder — add the cooled roasted spices to your spice grinder (a small dry mixer jar works well) and grind to a fine powder. If you want a slightly textured masala the way some traditional recipes call for, pulse rather than blend continuously.
- Add the powdered spices — now add the amchur, anardana, Kashmiri chili powder, dry ginger, and black salt. Pulse 2-3 times just to combine — you don’t want to grind the powder further, just mix.
- Sieve if desired — pass through a fine mesh sieve to remove any cardamom husk pieces. Press the solids through with a spoon — there’s still flavor in them.
- Store immediately — transfer to an airtight glass jar. Label it with the date. It’ll keep at room temperature for up to 3 months, or in the freezer for 6 months.
Tips for Perfect Pav Bhaji Masala Every Time
- Don’t skip the dry roasting. The transformation that happens when whole spices hit a hot dry pan is where the magic lives. Raw spices ground straight will give you a flat, grassy flavor.
- Buy whole spices, not pre-ground. Pre-ground coriander and cumin have already lost much of their volatile oils by the time they reach you. Whole spices that you roast and grind fresh are categorically superior.
- Adjust the amchur to taste. The recipe as written is moderately tangy. For the very sharp, punchy tang of a good Mumbai bhaji stall, increase the amchur by another half teaspoon.
- Use Kashmiri chili for color, regular chili for heat. Kashmiri red chili is mild but gives an extraordinary deep red color. If you want more heat, add a separate ¼ teaspoon of regular red chili powder.
- Store away from heat and light. A dark cabinet, not next to the stove — heat and humidity are the enemies of any spice blend.
Variations: Adapting This for Dietary Needs
Jain Version
This spice blend is naturally Jain-friendly. Just make sure your individual spice sources are processed in Jain-friendly facilities if that’s important to you. The blend itself contains no root vegetables or underground ingredients.
No-Onion-No-Garlic Version
The masala blend itself has no onion or garlic — it’s the pav bhaji recipe that typically uses them. The spice blend is NONG-safe as is.
Low-Heat Version
For kids or those sensitive to spice, reduce the Kashmiri chili to ½ teaspoon and skip any regular red chili entirely. The flavor will still be excellent — the warmth comes from pepper and cloves, which you can also reduce slightly.
For the Indian Diaspora Abroad
If you can’t find anardana powder, substitute with an extra ¾ teaspoon amchur. If you can’t find kala namak, regular sea salt works fine — you just lose that subtle sulphuric depth. Most other ingredients are available at any international grocery store or on Amazon.
What to Serve With Your Pav Bhaji Masala-Spiced Dishes
- Classic pav bhaji — obviously the primary use case. Check out the authentic Mumbai pav bhaji recipe that uses this blend.
- Masala toast or bread rolls — a small amount of pav bhaji masala mixed into a veggie stuffing for toast works very well.
- Chole (chickpea curry) — adding 1 teaspoon of pav bhaji masala to your chole masala gives it a unique, slightly tangy twist.
Storage and Reheating (For the Masala and the Bhaji)
For the homemade masala: Store in an airtight glass jar in a cool, dark place. Properly stored, it will hold its flavor well for up to 3 months at room temperature, 6 months in the freezer. Before using from frozen, let it come to room temperature and give it a sniff — you’ll know if it’s still good. Fresh spices smell like something; stale spices smell like dust.
For leftover pav bhaji: Store in the fridge for up to 3 days. Reheat gently on the stovetop with a small splash of water and a tiny knob of butter. Don’t microwave it directly from the fridge in a covered container — steam makes it watery. If you must microwave, leave the lid slightly ajar and add a bit of butter on top. Check out the full guide to storing and freezing bhaji for more on this.
Frequently Asked Questions
Can I use garam masala instead of pav bhaji masala in an emergency?
Yes, but you must add a souring agent to compensate for what garam masala lacks. Add 1 teaspoon of amchur powder and a squeeze of lemon juice for every tablespoon of garam masala you use in place of pav bhaji masala. Without the sourness, your dish will taste like a pleasant curry but not like authentic pav bhaji. See the emergency substitute formula above for exact quantities.
What is the main difference between pav bhaji masala and garam masala?
The single biggest difference is the presence of amchur (dry mango powder) and anardana (dried pomegranate powder) in pav bhaji masala — these create its characteristic tangy flavor. Garam masala contains no sour agents at all. Pav bhaji masala is also typically used mid-cooking to build the dish’s base flavor, while garam masala is usually a finishing spice added at the very end.
Is pav bhaji masala spicier than garam masala?
Not necessarily hotter in terms of chili heat, though it can be. Pav bhaji masala is bolder and more assertive in overall flavor. Garam masala can actually feel “hotter” in the Ayurvedic warming sense because of higher proportions of black pepper, cloves, and cinnamon. But in terms of chili-based spiciness, pav bhaji masala usually has more Kashmiri red chili, giving it a deeper red color and a mild heat.
Which brand of pav bhaji masala is best?
I know purists will disagree with recommending store-bought at all, but MDH Pav Bhaji Masala and Everest Pav Bhaji Masala are both excellent and widely available in India and in Indian stores abroad. MDH is consistently reliable. That said, the homemade version in this post genuinely tastes better than both once you get the proportions right.
How much pav bhaji masala should I use for one serving of pav bhaji?
A standard recipe serving 4 people typically calls for 1.5 to 2 tablespoons of pav bhaji masala. If you’re using a homemade blend, start with 1.5 tablespoons, taste the bhaji after it’s cooked down, and adjust. Homemade blends can be more potent than commercial ones since they’re fresher.