
How to Make Ghee at Home Using Supermarket Butter (Easy Step-by-Step Guide)
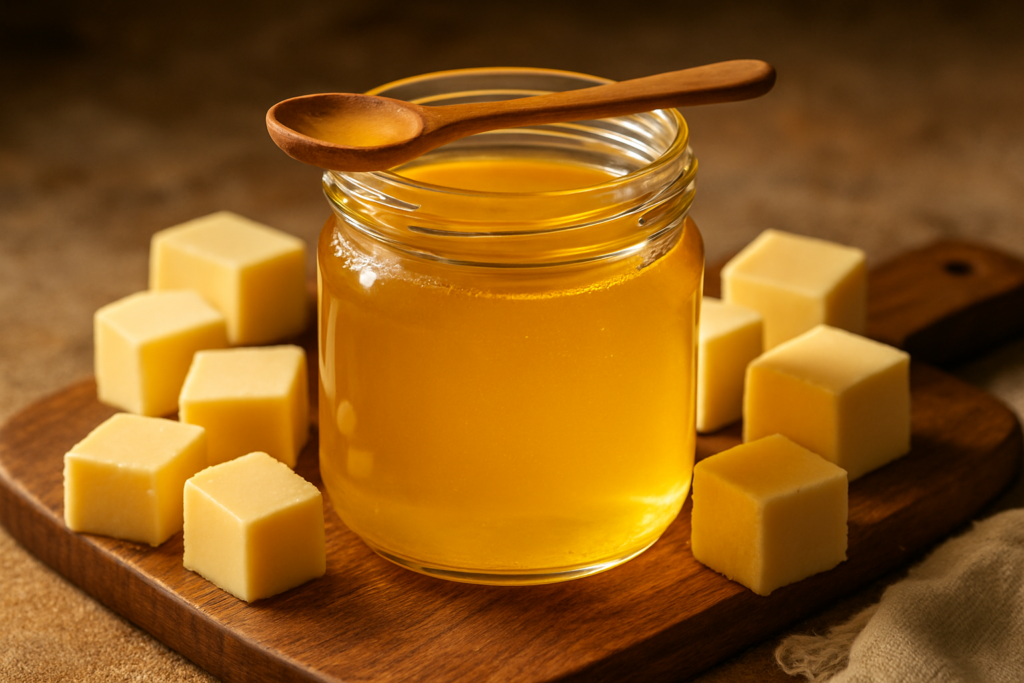
Making ghee at home from supermarket butter takes under 30 minutes and produces pure, additive-free clarified butterfat that tastes better than most commercial brands at a fraction of the cost. The process is simple: melt unsalted butter over a low flame, simmer until the water evaporates and the milk solids turn golden, then strain through muslin into a clean jar. Here is everything you need to know.
Learning how to make ghee at home from supermarket butter is genuinely one of the most useful skills in an Indian kitchen. It takes less than 30 minutes, costs a fraction of what the fancy jarred ghee costs at the Indian grocery store, and the result tastes better than most commercial brands. The process is called clarifying butter, where you cook off all the water content and milk solids, leaving behind only the pure golden butterfat. That pure fat is what we call ghee, and it has a higher smoke point, a longer shelf life, and that absolutely addictive nutty flavour that no refined oil can compete with.
Prep Time: 2 minutes
Cook Time: 25–30 minutes
Total Time: 30–32 minutes
Servings / Yield: Approximately 350–360 ml ghee (from 500g butter)
Summary: This is the simplest, most reliable method to make pure golden ghee at home using unsalted supermarket butter. You melt the butter on a low flame, let it simmer until the milk solids turn golden and settle, then strain through a muslin cloth into a clean jar. No special equipment needed — just patience and a watchful eye.
Why You’ll Love This Homemade Ghee Recipe
- Incredibly affordable: A 500g block of unsalted butter costs a fraction of a good-quality jar of ghee. You get roughly the same amount of ghee for much less money.
- You control the quality: No preservatives, no additives, no mystery ingredients. Just pure clarified butter.
- Long shelf life: Properly made homemade ghee lasts 2–3 months at room temperature and up to a year in the fridge, so you can make a big batch and forget about it.
- Works with any supermarket butter: Lurpak, President, Amul, Kerrygold, Anchor — they all work. Even salted butter works in a pinch (see the note below).
- The smell alone is worth it: There is truly nothing like the aroma of ghee cooking on the stovetop. It’s aromatherapy and cooking at the same time.
Ingredients You’ll Need for Ghee from Butter
- 500g unsalted butter — This is your only ingredient. Unsalted butter gives a purer, cleaner ghee without any saltiness. In the Indian context, Amul unsalted butter works perfectly. Abroad, Lurpak, Kerrygold, or any good European-style butter works brilliantly. The higher the fat content on the label (82–84% butterfat), the better and more flavourful your ghee will be.
A Note on Substitutions
- Can you use salted butter? Yes, but it’s not the first choice. The salt doesn’t evaporate — it concentrates as the water cooks off, making your ghee slightly salty. That said, it works fine for tadkas and cooking. Just don’t use it for Indian sweets where the saltiness would be noticeable. If you must use salted butter, go for a low-sodium brand.
- Can you use cultured butter or European-style butter? Absolutely yes — and actually, cultured butter is preferable. It has a slightly tangy, complex flavour that comes through beautifully in the finished ghee. Kerrygold is a personal favourite for this.
- Quantity scaling: This recipe scales perfectly. Use 250g for a smaller batch or 1kg for a larger one — just adjust your cook time accordingly. A larger batch takes longer but is more economical.
How to Make Ghee at Home — Step-by-Step Instructions
Read through all the steps once before you start. The process is very simple but it does require your attention during the last 10 minutes — this is not a “set it and forget it” recipe.
- Set up your equipment. You’ll need a heavy-bottomed saucepan (stainless steel or thick-bottomed aluminium works best — avoid non-stick as it makes it hard to see what’s happening at the bottom), a fine mesh strainer lined with a single layer of clean muslin cloth or cheesecloth, a clean dry glass jar to collect the ghee, and a heat-safe ladle or spoon. Make sure your jar is completely dry — even a drop of water in ghee can cause it to go rancid quickly.
- Cut the butter and place it in the pan. Cut your 500g block of unsalted butter into roughly equal cubes — about 8–10 pieces. This helps it melt evenly and quickly. Place all the pieces in the saucepan.
- Melt on medium heat. Turn the flame to medium and let the butter melt, stirring occasionally. Within 3–4 minutes it should be completely liquid and looking like a yellow, slightly foamy pool. The foam you see on top is normal — it’s water vapour and proteins starting to separate.
- Reduce the flame to low and let it simmer. Once fully melted, reduce the heat to low-medium. You want a gentle, consistent simmer — small bubbles breaking at the surface. If it’s bubbling aggressively and splattering, your heat is too high. Lower it. Splattering butter means water is still present and escaping rapidly — totally normal at this stage, but manage your heat carefully.
- Watch for the three stages. Over the next 15–20 minutes, your butter will go through three distinct stages:
- Stage 1 (Minutes 5–10): Lots of foam and bubbling. The butter looks milky and white-ish. Water is evaporating. The sound is a lively sizzle.
- Stage 2 (Minutes 10–18): The foam on top starts to reduce and the liquid becomes clearer and more golden. You’ll start to see white milk solids settling at the bottom of the pan. The bubbling slows down.
- Stage 3 (Minutes 18–25): The liquid is now clear, beautiful amber-gold. The milk solids at the bottom are turning light golden-brown (not dark brown — watch carefully here). The bubbling almost stops, the sputtering quiets down, and there’s a gorgeous nutty, almost caramel aroma. This is the moment. This is when your ghee is ready.
- Turn off the heat immediately. The moment you see the milk solids at the bottom turn a light golden colour and the liquid runs completely clear with a deep golden hue — turn off the flame. Don’t walk away during Stage 3. Ghee can go from perfect to burnt in under a minute once the milk solids start colouring. Burnt ghee is bitter and the batch is lost.
- Let it rest for 3–4 minutes. Allow the ghee to sit off the heat for a few minutes. This lets any remaining solids settle further to the bottom and makes straining easier.
- Strain into your jar. Set your muslin-lined strainer over your clean, dry glass jar. Carefully and slowly pour the ghee through the strainer. The muslin will catch all the milk solids and any impurities. What flows through into the jar should be a stunning, clear, deep golden liquid.
- Cool completely before closing the jar. Leave the jar uncovered at room temperature until the ghee cools completely and solidifies. This takes about 1–2 hours depending on your kitchen temperature. In summer it may stay liquid or semi-solid; in winter it’ll firm up into a soft pale yellow solid. Both are perfectly normal. Once cool, close the lid tightly and store.
Tips for Perfect Homemade Ghee from Butter Every Time
- Low and slow is the golden rule. The biggest mistake beginners make is cooking on too high a flame to “speed things up.” High heat burns the milk solids before the water has fully evaporated, giving you bitter, dark ghee. Patience on a low-medium flame gives you that gorgeous, nutty golden ghee.
- Don’t stir during the final stage. In the last 5–7 minutes (Stage 3), avoid stirring. Stirring dislodges the milk solids that have settled at the bottom and makes it harder to judge the colour. Let them sit and colour gently on their own.
- Your nose knows. The smell is the most reliable indicator that your ghee is ready. When it shifts from a slightly dairy, milky smell to a deep, nutty, almost biscuit-like or caramel aroma — it’s done. Trust your nose as much as your eyes.
- Dry jar, always. A single drop of moisture in your ghee jar can introduce bacteria and cause it to go rancid within days. Wash your jar, dry it thoroughly, and if you’re being extra careful, warm it in an oven at 100°C for 5 minutes to make sure it’s completely moisture-free.
- The milk solids are edible — don’t throw them away! Those toasty golden bits left in the muslin can be mixed into wheat dough for rotis or sprinkled over a bowl of rice. They taste like the most amazing browned butter and are worth keeping.
Variations and Adaptations
Jain / No-Onion-No-Garlic Version
Ghee itself is completely Jain-friendly and free of any alliums. This recipe doesn’t use onion or garlic in any form. It’s pure, sattvic, and suitable for Jains and those following a no-onion-no-garlic lifestyle. Many Jain households in Gujarat and Rajasthan make ghee at home exactly this way.
Vegan Alternative
Traditional ghee cannot be made vegan as it is derived from dairy butter. However, if you’re looking for a plant-based alternative with similar cooking properties, coconut oil is the closest substitute for high-heat cooking, and vegan butter brands like Violife or Miyoko’s can technically be “clarified” but the result is not the same as ghee. I know purists will roll their eyes, but there are also some commercial “vegan ghee” products made from coconut and cashew oils that work decently in everyday Indian cooking.
Herb-Infused Ghee
Once your ghee is ready and still warm (but off the heat), you can drop in a few curry leaves, a small dried red chilli, or even a pinch of turmeric for an infused ghee that’s fabulous drizzled over dal or khichdi.
Gluten-Free
Pure homemade ghee is naturally 100% gluten-free. The clarification process removes all milk proteins (including casein) and milk sugars (lactose), leaving behind only pure butterfat. Many people who are mildly lactose-intolerant can tolerate ghee without any issues, though if you have a severe dairy allergy, please consult your doctor.
What to Serve With Homemade Ghee
Honestly, the better question is: what don’t you serve with ghee? But here are some absolute favourites:
- Dal Tadka: A generous spoonful of fresh homemade ghee stirred into a hot bowl of restaurant-style dal tadka is, in my completely unbiased opinion, one of the most perfect things you can eat. The ghee enriches the dal and carries all those spice flavours.
- Phulka Rotis: Brush a tiny bit of ghee on a freshly puffed phulka straight off the flame and let it melt into the bread.
- Khichdi or Steamed Rice: A spoonful of ghee on a bowl of simple rice and dal khichdi is the ultimate Indian comfort food. Add a pinch of salt, a squeeze of lemon, and you have a complete meal.
Storage and Reheating
One of the best things about homemade ghee is how well it keeps:
- Room temperature: Store in a clean, airtight glass jar away from direct sunlight and heat. Properly made ghee (with all moisture removed) keeps at room temperature for 2–3 months easily. In hot climates (above 30°C), it’ll stay liquid, which is perfectly fine.
- Refrigerator: Lasts up to 12 months in the fridge. It will solidify into a firm, pale yellow block, which is normal. Scoop out what you need and let it come to room temperature.
- Freezer: Ghee can be frozen in small portions for up to 2 years. Pour into an ice cube tray, freeze, then transfer to a zip-lock bag. One cube = roughly 1 tablespoon, perfect for portioning.
- Reheating: Ghee doesn’t need “reheating” per se — just scoop out what you need and it’ll melt instantly in a warm pan. If your jar is solidified, leave it on the counter for 20 minutes and it’ll soften.
- Signs it’s gone bad: Good ghee has a nutty, clean, pleasant smell. If it smells rancid, sour, or “off” — discard it. This usually only happens if moisture got into the jar during storage.
According to Wikipedia’s entry on ghee, traditionally prepared ghee has been used in South Asian and Middle Eastern cuisines for thousands of years, and its long shelf life without refrigeration made it especially valuable in pre-refrigeration times.
Frequently Asked Questions About Making Ghee at Home
How long does it take to make ghee from butter at home?
From a 500g block of butter, the total cook time is typically 25–30 minutes on a low-medium flame. Smaller batches (250g) take around 15–18 minutes. Larger batches (1kg) can take 40–50 minutes. The key is maintaining a consistent low-medium flame and not rushing the process with high heat.
Can you make ghee with salted butter?
Technically yes, but it’s not the recommended primary method. The salt in salted butter doesn’t evaporate — it concentrates as the water cooks off, resulting in a slightly salty ghee. This is fine for savory cooking like tadkas, curries, or sautéing vegetables, but it’ll be noticeable and unpleasant in Indian sweets like halwa or ladoo. If salted butter is all you have, go ahead — just keep its saltiness in mind when cooking.
Why did my ghee turn dark or smell burnt?
This almost always means the heat was too high during the final stage, or it cooked too long unattended. Once the milk solids at the bottom start turning colour, there is a very small window before they go from golden to burnt. Burnt ghee smells acrid and bitter — there’s no saving it, unfortunately. Start fresh on a lower flame and don’t leave the kitchen during the last 8–10 minutes.
How much ghee will I get from 500g of butter?
You’ll typically get about 350–375ml of ghee from 500g of unsalted butter. The rest is water (which evaporates) and milk solids (which get strained out). Higher-fat European butters like Kerrygold (84% butterfat) yield slightly more ghee than standard 80% fat butters. This is completely normal and expected — ghee is more concentrated than butter.
Does homemade ghee need to be refrigerated?
No — as long as it’s made correctly (all moisture removed) and stored in a clean, airtight, dry glass jar away from direct sunlight and heat, homemade ghee keeps perfectly at room temperature for 2–3 months. In fact, many traditional Indian households store ghee on the counter year-round. Refrigeration extends the shelf life to about a year but is not mandatory. The most important thing is keeping moisture out — always use a dry spoon to scoop ghee from the jar.



One thought on “How to Make Ghee at Home Using Supermarket Butter (Easy Step-by-Step Guide)”