How to Make Paneer at Home Without Whole Milk: The Best Guide for Diaspora Cooks Using 2% Milk
Why I Started Making Paneer With 2% Milk (And Never Looked Back)
The first time I tried figuring out how to make paneer at home without whole milk, I was standing in a grocery store in Toronto, staring blankly at a refrigerator full of 1%, 2%, skim, and oat milk, wondering where on earth the full-fat milk was hiding. Back in Pune, my mother-in-law would pick up thick, creamy buffalo milk from the neighbourhood dairy every single morning. Here? The closest thing I could find was 3.25% homogenised milk, and even that felt thin compared to what we grew up with.
I made my first batch with 2% milk and nearly cried. The curds were tiny and sad, the yield was embarrassing, and what little paneer I did get crumbled the moment I tried to cut it. I called my mother in Nagpur at midnight (her morning), and she laughed — not unkindly — and said, “Beta, you’re fighting the milk. Stop fighting it.” That one line changed everything. Once I understood why low-fat milk behaves differently, I could work with it instead of against it. Now my 2% milk paneer is genuinely good. Firm enough to fry, soft enough to crumble into bhurji, and it holds its shape in a rich makhani gravy without dissolving.
This post is everything I wish someone had told me that first desperate evening. Whether you’re in the US, UK, Canada, or Australia, and whether you’re working with 2% milk, semi-skimmed, or whatever low-fat option your local store stocks — I’ve got you covered. Let’s make some paneer.
Prep Time: 10 minutes
Cook Time: 20 minutes
Setting Time: 30–60 minutes
Total Time: About 1 hour 30 minutes
Servings: Makes approximately 200–220g (7–8 oz) paneer from 2 litres of 2% milk
This recipe teaches you exactly how to make paneer at home without whole milk by using simple techniques — extra acid, gentle heat, and proper pressing — to compensate for the lower fat content in 2% or semi-skimmed milk. The result is firm, fresh, beautifully textured paneer that’s perfect for curries, grilling, or crumbling.
Why You’ll Love This Homemade Paneer Low Fat Milk Recipe
- Made with milk you can actually find abroad — no hunting for full-fat or buffalo milk
- Honest yield expectations included — I’ll tell you exactly how much paneer to expect so you’re not surprised
- Beginner-friendly — step-by-step with sensory cues so you know exactly what to look for
- Healthier than store-bought — no additives, no preservatives, and you control every ingredient
- Customisable texture — I’ll show you how to make it firmer or softer depending on what you’re cooking
Ingredients You’ll Need for Paneer With 2 Percent Milk
The ingredient list is gloriously short. But the details matter enormously when you’re working with low-fat milk, so please read the notes.
- 2 litres (about 8.5 cups) 2% milk — This is your base. In the US, 2% reduced-fat milk works well. In the UK, semi-skimmed (which is typically 1.7% fat) also works with a slight adjustment (use a touch more acid). In Australia, “lite” milk at 2% fat is fine. Do not use skim or 0% fat milk — you simply will not get enough curds to make it worthwhile. If you can find 3.25% homogenised milk in Canada, that’s even better.
- 3–4 tablespoons fresh lemon juice OR 3–4 tablespoons white vinegar OR 200g plain yogurt — This is your coagulant. With low-fat milk, I actually prefer a combination: 2 tablespoons lemon juice + 1 tablespoon vinegar. The acetic acid in vinegar creates firmer, more cohesive curds, which is exactly what you need when fat content is lower. Yogurt gives a slightly softer, more traditional flavour but requires more volume.
- ½ teaspoon fine salt (optional, but adds flavour)
- 1 tablespoon heavy cream or full-fat cream (optional but highly recommended) — This is my secret weapon. Adding just one tablespoon of cream to your low-fat milk before heating significantly improves curd cohesion and yield. I know purists will raise an eyebrow, but it genuinely works and the difference is noticeable.
Equipment needed: A heavy-bottomed pot (at least 3-litre capacity), a fine mesh strainer or colander, cheesecloth or a clean thin cotton kitchen towel (a muslin cloth if you have one), a heavy flat-bottomed object for pressing (a cast iron pan or a pot filled with water), and a thermometer if you have one (helpful but not essential).
Step-by-Step Instructions: Making Paneer Abroad With Low-Fat Milk
- Prepare your coagulant mixture. Mix your lemon juice and vinegar together in a small bowl and set it near the stove. If you’re using yogurt, whisk it until smooth. Having this ready before you start heating the milk is important — you don’t want to be scrambling while hot milk waits. I learned this the hard way when I once left the milk boiling while searching my fridge for lemons. Scorched milk smells exactly as bad as you’d imagine.
- Heat the milk low and slow. Pour your 2% milk (and cream if using) into your heavy-bottomed pot. Set the heat to medium-low. Stir gently every minute or two to prevent a skin forming on top and to stop the bottom from scorching. You want to bring the milk to just below a full boil — look for vigorous steam, tiny bubbles forming around the edges, and the milk starting to froth and rise. If you have a thermometer, aim for 88–90°C (190–195°F). Do not let it boil aggressively — a rolling boil breaks fat globules differently in low-fat milk and can make your curds rubbery.
- Turn off the heat and add your acid. The moment you see that vigorous froth and the milk is about to boil, turn the heat completely off. Now, slowly pour in your coagulant — drizzle it in a thin stream while gently stirring in one direction. Add the acid gradually: pour in about two-thirds of it, stir gently for 30 seconds, and watch. You should see the milk start to separate — white curds pulling away from a greenish-yellow liquid called whey. This is exactly what you want. If after a minute the milk hasn’t fully separated (the liquid is still milky white rather than clear yellow), add the remaining acid a little at a time until separation is complete. Stop adding acid the moment you see clear whey — too much acid makes paneer rubbery and sour.
- Let it rest undisturbed. Once you see good separation, resist the urge to stir. Cover the pot with a lid and let it sit for 5–7 minutes. This resting period is crucial with low-fat milk because it allows those smaller, more fragile curds to continue firming up. The curds will gather into larger, more cohesive masses as they sit.
- Set up your straining station. Line your colander with two layers of cheesecloth (or your clean muslin/thin cotton cloth) and place it over a large bowl to collect the whey — please don’t discard the whey! It’s liquid gold for kneading dough, making soup, or watering your plants. Carefully ladle or pour the curd-whey mixture into the lined colander. Pour slowly and from close to the surface so you don’t break the curds apart.
- Rinse the curds with cold water. Gently pour about a cup of cold water over the curds. This serves two purposes: it washes off excess acid (reducing sourness) and — importantly for low-fat milk paneer — it slightly firms the curds. For paneer with 2% milk, this step is more important than it is with full-fat milk. Use cold water, not warm.
- Gather and squeeze. Bring the edges of the cheesecloth together over the curds and twist them into a tight ball. Give it a gentle squeeze — you want to remove most of the moisture, but don’t squeeze so hard that you compress the curds before shaping. You’re looking for the bundle to feel damp but not dripping.
- Shape and press. Flatten the bundle of curds while still in the cheesecloth into a rough disc or square shape about 2–3 cm thick. Place it on a flat plate or small cutting board. Set another flat surface on top (another plate or board), then place something heavy on that — a heavy cast iron skillet, or a pot filled with water works perfectly. For 2% milk paneer, I recommend pressing with moderate weight (about 2–3 kg / 4–6 lbs) for at least 45 minutes. Do not under-press low-fat paneer — it needs more compression time than full-fat paneer to hold together properly.
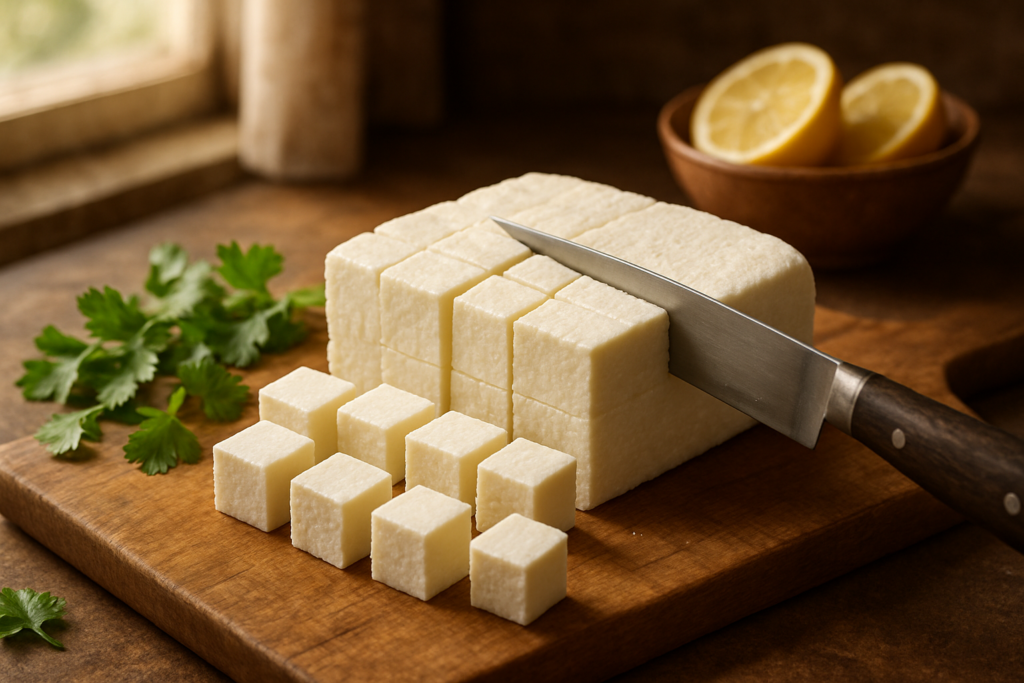
- Refrigerate before cutting. After pressing, carefully unwrap your paneer. It should look and feel firm — pale white, with a slightly smooth surface. Before cutting it, refrigerate it for at least 30 minutes. This cold resting time is something many recipes skip but is absolutely essential for paneer made with lower-fat milk. It allows the proteins to set fully, so your paneer won’t crumble when you slice or cube it.
- Cut and use. After chilling, unwrap and cut your paneer into cubes, slices, or crumble it — whatever your recipe requires. It’s now ready to use fresh, or store for later. Stand back and feel genuinely proud of yourself. That’s real, homemade paneer that you made in a country where buffalo milk doesn’t exist.
Tips for Perfect Homemade Paneer With Low-Fat Milk Every Time
Tip 1: The Cream Trick Is Not Cheating
Adding 1–2 tablespoons of heavy cream or even evaporated whole milk to your 2% milk before heating genuinely improves the fat content enough to make a significant difference in yield and texture. I started doing this after a particularly frustrating batch yielded less than 150g from 2 litres of milk. The cream addition boosted my yield by nearly 20% and made the curds more cohesive. If you’re worried about calories, honestly — at these quantities, the difference is negligible per serving of paneer.
Tip 2: Temperature Is Everything
With full-fat milk, you can afford to be a bit sloppy with temperature. With low-fat milk, you cannot. Too cool and the curds don’t form properly. Too hot (a raging boil) and you get tiny, tough, rubbery curds that don’t press into a cohesive block. That sweet spot just below boiling — where the milk is frothing and steaming vigorously — is your target. A cheap kitchen thermometer costs about $10 and takes all the guesswork out of this.
Tip 3: Don’t Over-Acidify
The instinct when curds aren’t forming is to add more and more acid. Resist this. Too much lemon juice or vinegar makes paneer sour-tasting and gives it a grainy, crumbly texture that falls apart in curries. Add the acid in stages, wait, and watch the whey. Clear yellow-green whey = you’re done. Still milky white = add a little more. It’s a watch-and-respond process, not a dump-it-all-in process.
Tip 4: Press Longer Than You Think You Need To
Standard paneer recipes say press for 20–30 minutes. For paneer with 2% milk, start at 45 minutes and go up to an hour if you want very firm paneer for frying or grilling. The lower fat content means you need mechanical compression to do some of the structural work that fat normally does. Patience here pays off enormously.
Tip 5: Always Chill Before Cutting
I mentioned this in the instructions but it bears repeating as a standalone tip because it’s the step most people skip when they’re excited and impatient (I have absolutely been that person). Refrigerating freshly pressed paneer for at least 30 minutes — ideally an hour — before cutting dramatically improves its structural integrity. You can even leave it overnight wrapped in cling film in the fridge. Next-day paneer cuts like a dream.
Variations: Making Paneer Abroad for Every Dietary Need
Jain / No-Onion-No-Garlic
The paneer recipe itself is naturally Jain-friendly — no onion, no garlic involved in making it. If you’re serving it in a Jain-friendly dish, just ensure your gravy or preparation follows those guidelines separately.
Using Yogurt as the Coagulant (Traditional Method)
If you prefer to avoid vinegar or lemon, you can use plain full-fat yogurt as your only coagulant — use about 200–250g per 2 litres of milk. The flavour is more traditional and mild. The downside with low-fat milk is that yogurt produces softer, more delicate curds that need extra pressing time. Works beautifully for paneer bhurji where you’re crumbling it anyway.
Lactose-Sensitive Variation
You can use lactose-free 2% milk with exactly the same method. The lactase enzyme used in lactose-free milk doesn’t interfere with coagulation. Yield and texture will be nearly identical to regular 2% milk.
Extra-Firm Paneer for Grilling or Tikka
After the initial pressing, unwrap the paneer, flip it over, re-wrap, and press again for another 30 minutes with more weight. Then refrigerate overnight. The next day you’ll have paneer firm enough to cube, marinate, and grill on skewers without falling apart — even with 2% milk.
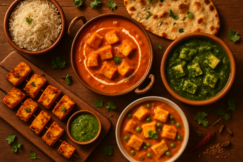
What to Serve With Your Freshly Made Paneer
Now that you’ve done the hard work, here’s the fun part:
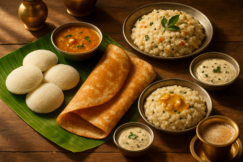
- Classic Palak Paneer — Fresh homemade paneer in a silky spinach gravy is one of life’s genuine pleasures. The soft, mild flavour of fresh paneer works beautifully here, and because you made it yourself it won’t have that rubbery, squeaky texture that store-bought paneer sometimes has.
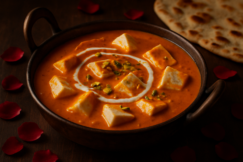
- Paneer Butter Masala — Cubed and lightly pan-fried, your homemade paneer holds up beautifully in a rich tomato-cream gravy. The slightly firmer texture of pressed low-fat paneer actually works in your favour here since it holds its cube shape even after simmering.
- Simple Paneer Bhurji — If your paneer crumbled a bit during pressing (it happens, especially the first few times), just embrace it and make bhurji — scrambled paneer with onions, tomatoes, and spices. It’s fast, delicious, and one of my personal favourite weeknight dinners. Check out my easy paneer bhurji recipe here.
Storage and Reheating
In the refrigerator: Place your cut paneer in an airtight container and submerge it in cold water. Change the water daily. It’ll stay fresh for 3–4 days. Some people add a pinch of salt to the water, which helps preserve it slightly longer.
In the freezer: Cube the paneer and place the cubes on a baking sheet in a single layer. Freeze until solid (about 2 hours), then transfer to a zip-lock bag. Frozen paneer keeps well for up to 2 months. To use, thaw overnight in the refrigerator or submerge the frozen cubes in warm water for 20–30 minutes. Note that frozen-then-thawed paneer has a slightly spongier, more porous texture — which actually helps it absorb gravy beautifully in dishes like makhani.
Reheating: Never microwave paneer on its own — it turns rubbery. Always reheat paneer in whatever sauce or gravy you’re cooking it in, over medium-low heat. If you’ve stored paneer cubes in water, pat them dry before adding to a hot pan.
For more on the nutritional profile of paneer and why it’s such a valuable protein source in vegetarian diets, Healthline has a thorough breakdown of paneer’s nutrition facts. And if you’re curious about the broader history of paneer as a fresh cheese across South Asia, Wikipedia’s entry is actually quite fascinating — it’s one of the few fresh cheeses with deep roots in the Indian subcontinent.
Frequently Asked Questions About Making Paneer at Home Without Whole Milk
Why is my paneer crumbling instead of staying in a block?
This is the most common problem with low-fat milk paneer, and it almost always comes down to one of three things: not enough pressing time, not chilling before cutting, or too much acid added during coagulation. With 2% milk, you need to press for at least 45–60 minutes with good weight, refrigerate the pressed paneer for at least 30 minutes before unwrapping and cutting, and make sure you stopped adding acid the moment you saw clear yellow-green whey. If you did all three and it still crumbles, try adding a tablespoon of cream to your milk next time.
How much paneer will I get from 2 litres of 2% milk?
Honestly? Less than you’d get from whole milk — and I think it’s important to be upfront about this so you’re not disappointed. From 2 litres of 2% milk, expect roughly 180–220g (6.5–8 oz) of paneer. From 2 litres of whole milk (3.5%+ fat), you’d typically get 300–350g. The addition of a tablespoon of cream can push your yield up to 230–250g from 2% milk. Plan your recipes accordingly — if a recipe calls for 250g of paneer, start with 2.5 litres of 2% milk.
Can I use plant-based milk to make paneer?
Short answer: not really, not in the traditional sense. Paneer is by definition a fresh dairy cheese that forms when milk proteins (primarily casein) coagulate with acid. Plant milks don’t contain casein and generally don’t coagulate the same way. You can make tofu using a similar pressing method, and it’s a valid substitute in many dishes, but it’s a different product. For diaspora cooks who are vegan, tofu is the closest practical substitute — firm tofu especially, when pressed and marinated, works reasonably well in dishes like palak “paneer”.
My whey looks milky white even after adding a lot of acid. What’s happening?
A few possibilities: your milk wasn’t hot enough when you added the acid (the milk needs to be at or just below boiling — a key step when learning how to make paneer at home without whole milk), the acid you’re using has lost its potency (old lemon juice or very diluted vinegar), or you’re stirring too vigorously and breaking the forming curds back into the liquid. Try reheating the mixture gently to near-boiling and adding a fresh batch of acid. If you’ve already added a large amount of acid and the whey is still milky, the milk itself may be ultra-pasteurised (UHT) — some ultra-pasteurised milk simply doesn’t coagulate well because the high-heat processing damages the proteins. Check your milk carton and try a non-UHT brand.
Can I use apple cider vinegar instead of white vinegar?
Yes, you can — it works perfectly well as a coagulant and the acetic acid content is similar to white vinegar. The only difference is that apple cider vinegar has a slightly fruity, mild flavour. In the quantities used for making paneer, this flavour is largely neutralised by the cold water rinse and the pressing, so most people can’t taste any difference in the final paneer. I’ve used it many times when I’ve run out of white vinegar and the paneer has been perfectly fine. Avoid balsamic or red wine vinegar though — those can impart a noticeable colour and flavour.